Скачать с ютуб How I Cleaned My Halo Swivel Bassinest в хорошем качестве
How I Cleaned My Halo Swivel Bassinest
4 года назад
Скачать бесплатно How I Cleaned My Halo Swivel Bassinest в качестве 4к (2к / 1080p)
У нас вы можете посмотреть бесплатно How I Cleaned My Halo Swivel Bassinest или скачать в максимальном доступном качестве, которое было загружено на ютуб. Для скачивания выберите вариант из формы ниже:
Загрузить музыку / рингтон How I Cleaned My Halo Swivel Bassinest в формате MP3:
Если кнопки скачивания не
загрузились
НАЖМИТЕ ЗДЕСЬ или обновите страницу
Если возникают проблемы со скачиванием, пожалуйста напишите в поддержку по адресу внизу
страницы.
Спасибо за использование сервиса savevideohd.ru
How I Cleaned My Halo Swivel Bassinest
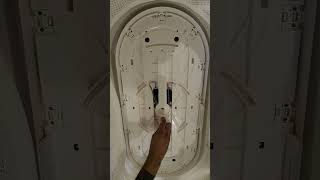
Instagram @_mrsbrandy Business Inquiries: [email protected] *email address is subject to change as I am currently in the process of a new channel name. Information will be updated once a new channel name goes into effect. All opinions and products I used are my own. I purchased this second hand and wanted to share how I was able to deep clean the Halo Swivel Bassinest. Prior to washing it was in decent condition (no moldy spots). This is the Halo swivel bassinest that was made in 2017. I knew the year because of the sticker that was on the inside (after removing all fabric). Products I used to sanitize and clean the fabric: Hand vacuum any loose debris or dust. Then a steamer was used to steam all fabric, including the mattress. After the steam process, I washed the fabric by hand in 3 washes. Using vinegar and warm water solution, pyrex and warm water, then baby detergent and warm water. The mattress can’t be washed, only wiped down (according to Halo website). I was very gentle with the fabric while hand washing and ringing out the excess water. Air dry the fabric and when everything was dried, I put the fabric back on the bassinest. I also left the mattress out in my living room so it could air out. I wouldn’t suggest delicate cycle in machine. Level of difficulty: Moderate Tips that helped me: Take my time and be very gentle. Handwash fabric, no machine wash or delicate cycle. When assembling and removing fabric and side bars, always make sure both sides are balance or inlined with each side. Step 1: Hand vacuum any loose debris or dust and remove mattress. Step 2: At the inside of the bassinest, open the slit that has the Velcro. Step 3: Using a screw driver, unscrew 6 of the screws halfway out and remove from base. Step 4: Remove front and back bars. I used a screwdriver to help me press down the tabs at the front and back bars. Step 5: Remove both side panels by pressing down on tabs. Step 6: Unscrew the 3 screws at the middle base connector. Kept my screws in a place that I would not lose them! Step 7: The 6 screws are still attached to the board. Remove sleeve by lining up the side panel, and carefully pull back and slide one side of the sleeve. Step 8: Once fabric is removed. I hand washed the fabric (see “Products I used to sanitize and clean the fabric”). Assemble back together… Rewind what you did to remove the fabric. Step 9: Lay fabric flat on ground. Insert board back into fabric with sticker facing up. I like to say it’s like putting on a coat, start with one side and then finish the other side. Also, line up the fabric with the side panels just as it was done in Step 7. Step 10: Screw 3 screws back and insert the other 6 screws. The fabric needs to lined up with the holes. Step 11: Line up the base and attached to the 6 screws. Make sure it is locked in. Step 12: Screw 6 screws. Do not make screws too tight or too loose. Step 13: Base should be secured and able to put back onto to stand. Step 14: The Slit’s velcro should be put back into place. To ensure the fabric is assembled the right way, the Halo Bassinest logo should be facing you. Step 15: Insert side panels and side bars. Side bars were difficult for me to put back so again, I used a screw driver to help press down the tabs. Put remaining velcro parts together. FTC: This video is not sponsored. All thoughts and opinions are my own. Some links in the description box are affiliate links. I receive a small percentage of the revenue from purchases made through the affiliate links.
Comments