Скачать с ютуб Shelly Wall Display Test - Anleitung für Shelly App & Home Assistant в хорошем качестве
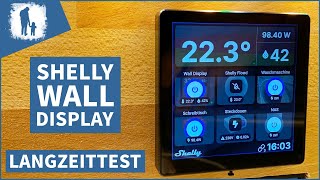
Shelly Wall Display Test - Anleitung für Shelly App & Home Assistant
9 месяцев назад
Скачать бесплатно Shelly Wall Display Test - Anleitung für Shelly App & Home Assistant в качестве 4к (2к / 1080p)
У нас вы можете посмотреть бесплатно Shelly Wall Display Test - Anleitung für Shelly App & Home Assistant или скачать в максимальном доступном качестве, которое было загружено на ютуб. Для скачивания выберите вариант из формы ниже:
Загрузить музыку / рингтон Shelly Wall Display Test - Anleitung für Shelly App & Home Assistant в формате MP3:
Если кнопки скачивания не
загрузились
НАЖМИТЕ ЗДЕСЬ или обновите страницу
Если возникают проблемы со скачиванием, пожалуйста напишите в поддержку по адресу внизу
страницы.
Спасибо за использование сервиса savevideohd.ru
Shelly Wall Display Test - Anleitung für Shelly App & Home Assistant
In diesem Video zeige ich euch was das Shelly Wall Display alles kann. Das Shelly Display wird die Hauselektronik wie wir es kennen komplett verändern. Als erstes machen wir dafür ein unboxing und packen das Shelly Wall Display aus und begutachten den Inhalt. Danach machen wir die Montage und richten es ein. Anschließend packen wir das Shelly Wall Display in die Shelly App und schauen dort die Möglichkeiten an. In der Shelly App machen wir auch eine einfache Automatisierung. Danach integrieren wir das Shelly Wall Display ins Home Assistant. Dort erstellen wir uns eine passende Visualisierung auf dem Dashboard und erstellen zum Schluss eine Automatisierung im Home Assistant. Viel Spaß beim Schauen :-) #shelly #smarthome #homeassistant Wichtig: Beachtet bitte das nur ein Fachmann das Shelly Wall Display einbauen sollte. Macht das nicht selbst. *Das Shelly Wall Display könnt ihr hier bekommen: Shelly Wall Display - https://amzn.to/3ZmAoka Folge 89 Kapitel 00:00 - Trailer 00:35 - Intro / Vorworte 02:19 - Unboxing des Shelly Wall Displays 06:09 - Montage Shelly Wall Display 07:08 - Erstinbetriebnahme Shelly Wall Display 09:43 - Einrichtung in der Shelly App (Shelly Smart Control) 18:12 - Erstellung des Thermostats 23:02 - Erstellung einer Szene (Automatisierung) in der Shelly App 26:19 - Look & feel des Shelly Wall Displays 30:44 - Einrichtung in Home Assistant 36:09 - Erstellung einer Automatisierung in Home Assistant 37:36 - Einrichtung auf der Oberfläche 39:41 - Outro / Fazit Euer eigenes Home Assistant könnt ihr ganz einfach selbst zusammenstellen*: Raspberry Pi 5 (8 GB) - https://amzn.to/3IqqSVt Netzteil - https://amzn.to/3PyyXM3 Mein Gehäuse - https://amzn.to/49IR6yu Mein Lüfter - https://amzn.to/4a75T65 Speicherkarte - https://amzn.to/3r8lpua (nicht meine Empfehlung aber möglich) ODER SSD - https://amzn.to/3KlDGfd (meine Empfehlung da langlebiger als eine Speicherkarte) SATA zu USB Kabel - https://amzn.to/3DNF1c4 Meine Werkzeuge*: JOKARI Abisolierzange Super 4 plus - https://amzn.to/3ud2T65 JOKARI Vielzweckabisoliermesser Nr.15 - https://amzn.to/3u9utkl Wera Kraftform Schraubendreher Set 12-teilig - https://amzn.to/3DHGn8h BENNING DUSPOL analog. Spannungsprüfer - https://amzn.to/3junzmZ Wiha Spannungsprüfer - https://amzn.to/3J5fbS8 KNIPEX Flachrundzange - https://amzn.to/3JbfGdo WAGO 2er Klemmen - https://amzn.to/3gLXmiG WAGO 3er Klemmen - https://amzn.to/3Ku3sx4 WAGO 4er Klemmen - https://amzn.to/3voCjHx WAGO 5er Klemmen - https://amzn.to/3DG4Ue6 WAGO 2er Hebel-Klemmen - https://amzn.to/3VqmBG2 WAGO 3er Hebel-Klemmen - https://amzn.to/3OFpGzW WAGO 5er Hebel-Klemmen - https://amzn.to/3UbX3LX Meine Ausrüstung*: Meine Hauptkamera: Sony Alpha 6700 - https://amzn.to/3E81XE4 Mein Objektiv 1: Sony SELP-18105G - https://amzn.to/45pv5mg Mein Objektiv 2 : Sony E 11 mm F1.8 - https://amzn.to/3ORzVSj Meine Kameratasche: PEDEA Kameratasche - https://amzn.to/3Eb1dOz Meine Speicherkarte: Sony SF-M256T SD-Speicherkarte - https://amzn.to/3KVNmiK Meine 2. Kamera: Iphone 15 Pro Max 256 GB - https://amzn.to/47xYlbu Meine 3. Kamera: iPad Air 4 - https://amzn.to/3ciATrw Mein großes Stativ: SMALLRIG Videostativ - https://amzn.to/3tcjqZT Mein kleines Stativ: Manfrotto PIXI Tischstativ - https://amzn.to/3Al99uk Meine Kamerahalterung: Manfrotto Smartphone Halterung Pro Version - https://amzn.to/3vCPPGH Mein 1. Mikrofon: RØDE VideoMicro - https://amzn.to/3KKbRNX Mein 2. Mikrofon: RØDE Wireless GO II - https://amzn.to/3QNKsgT Mein Reiserucksack: deuter Giga EL - https://amzn.to/3P9y6Bj (*) Alle mit einem Stern gekennzeichneten Produkte verweisen auf die Amazon Webseite. Falls ihr das verlinkte Produkt kauft, erhalte ich eine kleine Provision für die Vermittlung. Der Preis ändert sich für euch dadurch nicht! Ihr unterstützt damit meinen Kanal und meine Arbeit :-)
Comments