Скачать с ютуб Complete Room Build Start to Finish at My Cabin in the Woods (No Music) в хорошем качестве
Complete Room Build Start to Finish at My Cabin in the Woods (No Music)
4 месяца назад
Скачать бесплатно Complete Room Build Start to Finish at My Cabin in the Woods (No Music) в качестве 4к (2к / 1080p)
У нас вы можете посмотреть бесплатно Complete Room Build Start to Finish at My Cabin in the Woods (No Music) или скачать в максимальном доступном качестве, которое было загружено на ютуб. Для скачивания выберите вариант из формы ниже:
Загрузить музыку / рингтон Complete Room Build Start to Finish at My Cabin in the Woods (No Music) в формате MP3:
Если кнопки скачивания не
загрузились
НАЖМИТЕ ЗДЕСЬ или обновите страницу
Если возникают проблемы со скачиванием, пожалуйста напишите в поддержку по адресу внизу
страницы.
Спасибо за использование сервиса savevideohd.ru
Complete Room Build Start to Finish at My Cabin in the Woods (No Music)
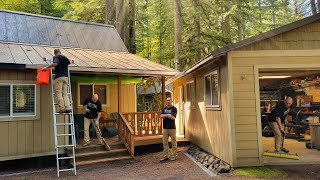
In this video, I complete a brand new project at my off grid cabin... the deck room! The previous owners of this cabin in the woods built walls onto the old deck and created a new room out of it. However, they never completed it. Now it's time to finish it! I must begin by finishing the framing of the 2x6 and 2x4 walls and filling the cavities in the ceiling between the rafters with fiberglass insulation. After finishing the framing and insulation of the room, it was time to hang the drywall. I used a Buildman Metaltech Drywall and Panel Hoist to assist with installing the sheetrock on the ceiling, then I finished the walls using a ladder. I also had to account for cutting out holes for 3 electrical outlets, as well as 2 lights in the ceiling, and 1 light switch box near the front door. I then did my own tape, texture, primer and paint. Using mostly tools I already had (plus some I made myself) I did my own hand texture using a scrap sheet of Tyvek. I've been procrastinating this project due to a fear of doing a poor job texturing. I had never done any drywall before this project. But I think it turned out looking pretty good considering everything. Be not afraid of doing things yourself, you can do it! All you gotta do is try! Picking up where I left off... With the walls and ceiling now sheetrocked, textured and painted, it was time to install the flooring. I began by laying down a layer of underlayment on top of the plywood subfloor. Then, I installed the interlocking pieces of flooring. Once the flooring was down, it was time to work on trimming out the windows, entryways, front door, and the baseboards of the walls. Finally, I wired the 3 electrical outlets and 2 LED lights with a dimmer switch by tapping into a wire underneath the cabin. Thanks for watching! For more content, check me out on Instagram: / diegotrieshard
Comments