Скачать с ютуб Land Rover Discovery 2 TD5 Front Constant Velocity CV Joint Removal and Replacement How To в хорошем качестве
Land Rover Discovery 2 TD5 Front Constant Velocity CV Joint Removal and Replacement How To
1 год назад
Из-за периодической блокировки нашего сайта РКН сервисами, просим воспользоваться резервным адресом:
Загрузить через ClipSave.ruСкачать бесплатно Land Rover Discovery 2 TD5 Front Constant Velocity CV Joint Removal and Replacement How To в качестве 4к (2к / 1080p)
У нас вы можете посмотреть бесплатно Land Rover Discovery 2 TD5 Front Constant Velocity CV Joint Removal and Replacement How To или скачать в максимальном доступном качестве, которое было загружено на ютуб. Для скачивания выберите вариант из формы ниже:
Загрузить музыку / рингтон Land Rover Discovery 2 TD5 Front Constant Velocity CV Joint Removal and Replacement How To в формате MP3:
Если кнопки скачивания не
загрузились
НАЖМИТЕ ЗДЕСЬ или обновите страницу
Если возникают проблемы со скачиванием, пожалуйста напишите в поддержку по адресу внизу
страницы.
Спасибо за использование сервиса savevideohd.ru
Land Rover Discovery 2 TD5 Front Constant Velocity CV Joint Removal and Replacement How To
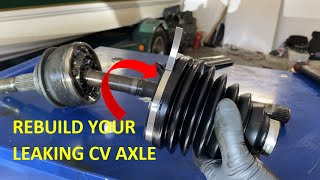
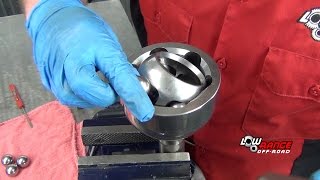
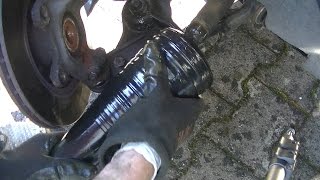
In today's video we're replacing both front axle constant velocity joints and the cv boots, both joints are in poor condition with lots of play, the cv boots are also brittle and probably the originals. It's an easy enough job it requires some basic tools and perseverance, a good vice/stand is advised we have a superjaws (link below) but a standard vice on a bench also works. You will need to remove the front hubs, this lets you pull the velocity joints out which in turn is connected to to the drive shaft then the entire thing will come out in one go. Once removed it's just a case of removing the old cv boot, there will be a lot of grease so have some rags/towels, then use a copper hammer to tap off the velocity joint in different areas (see video) and it should just pop off meanwhile the drive shaft is being held tight in a vice or by somebody. If you're replacing the velocity joint and it's difficult to come off then consider a lump hammer, but if you're keeping it to re grease and replacement the cv boot then just only use a copper hammer to not damage it. After the velocity joint is removed, there will be a snap ring and round collar on the end of the drive shaft, if you brought a kit (see below) then replace the snap ring and keep the collar, also give the entire thing a good clean and some light grease, I'd recommend dry fitting the new velocity joint if you have one before packing it with grease. If everything fits and no damage then proceed to fit the cv boot/clip, then slide the velocity joint on after greasing it, the grease needs to be pushed into the bearings with plenty left over behind. It may be tricky to push it onto the driveshaft end because of the snap ring but just jiggle and persist, once on put the cv boot clip on, then test the movement of the joint and you're done. The clips can be a pain to fit, especially the little one so make sure the first part fits under the raised 'dog ear' part of the clip then slide round, once on the two tabs crimp the dog ear with the correct pilers. I did actually clean the part of the driveshaft where the small section of the cv boot fits, it was rusty and just used a wire wheel as it's better to have a clean surface. Thanks for watching, we hope this video was helpful to you. Items we used: Discovery 2 Front Constant Velocity CV Joint Driveshaft And Hub: https://www.jgs4x4.co.uk/discovery-2-... (includes cv boot and clips) Discovery 2 Front Constant Velocity CV Joint Boot Kit: https://www.jgs4x4.co.uk/discovery-2-... Triton SJA100XL SuperJaws XXL Portable Clamping System https://amzn.to/3JQuwKc Laser 4136 Cv Boot Clamp Pliers https://amzn.to/3X9dyd6 #discoverytd5 #discovery2 #disco2
Comments