Скачать с ютуб How to Fix Windows10 Preparing Automatic Repair Error? [4 Solutions] в хорошем качестве
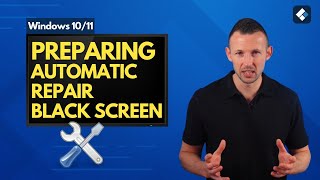
How to Fix Windows10 Preparing Automatic Repair Error? [4 Solutions]
3 года назад
Из-за периодической блокировки нашего сайта РКН сервисами, просим воспользоваться резервным адресом:
Загрузить через ClipSave.ruСкачать бесплатно How to Fix Windows10 Preparing Automatic Repair Error? [4 Solutions] в качестве 4к (2к / 1080p)
У нас вы можете посмотреть бесплатно How to Fix Windows10 Preparing Automatic Repair Error? [4 Solutions] или скачать в максимальном доступном качестве, которое было загружено на ютуб. Для скачивания выберите вариант из формы ниже:
Загрузить музыку / рингтон How to Fix Windows10 Preparing Automatic Repair Error? [4 Solutions] в формате MP3:
Если кнопки скачивания не
загрузились
НАЖМИТЕ ЗДЕСЬ или обновите страницу
Если возникают проблемы со скачиванием, пожалуйста напишите в поддержку по адресу внизу
страницы.
Спасибо за использование сервиса savevideohd.ru
How to Fix Windows10 Preparing Automatic Repair Error? [4 Solutions]
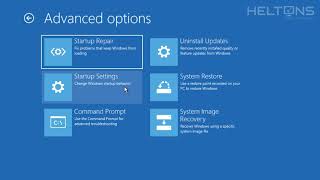
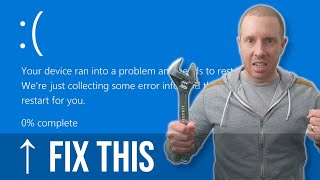
Stuck at the Windows 10 preparing automatic repair black screen? Check this video or follow the tutorial to fix the problem: http://bit.ly/2XwH4xd Windows 10 preparing automatic repair is a common Windows error that generally occurs when you initiate Windows Automatic Repair to fix a software-related issue. But, instead of repairing the system, it causes the PC to get stuck at the black screen. To fix the problem, there are 4 workable solutions. Timestamps: 0:00 Intro 0:53 Factors that might trigger Windows preparing automatic repair black screen 2:07 Solution 1: Boot into Safe Mode and Check for App Issues 3:12 Solution 2: Reinstall Graphics Drivers 4:14 Solution 3: Rebuild BCD 5:21 Solution 4: Disable Automatic Repair 6:30 Bonus: Recover Data If the Computer Failed to Boot Up How Fix a Black Screen after Preparing Automatic Repair? 1. Boot into Safe Mode Step 1: Power up your PC and choose to boot from the Windows Installation Media. Step 2: You’ll be prompted to the Windows Setup screen. Here click “Next” to proceed further. Step 3: Tap the “Repair Your Computer” button at the bottom-left corner. Step 4: Click “Troubleshoot and Advanced Options” and choose Command Prompt from the list. Step 5: Here execute the “bcdedit /set {default} safeboot minimal” command in the CMD window and close Command Prompt. Step 6: Click “Continue” to exit Advanced Startup and wait for your PC to restart automatically. 2. Reinstall the Graphics Driver Step 1: Once PC is successfully booted into safe mode, press “Windows” + “X” and choose “Device Manager”. Step 2: Expand the “Display Drivers” option and right-click the default graphics driver. Then tap the “Uninstall” button to remove its current version. Step 3: Wait for the driver to get uninstalled completely. Then go to the official website of your PC’s manufacturer and download the latest “Display Driver” pack for your PC accordingly. Step 4: Run the installer and follow the on-screen instructions to install the new version of display drivers. 3. Rebuild BCD Step 1: Fire Up your PC/laptop and boot from the Installation Media. Step 2: On the startup screen, click “Next” and then tap “Repair Your Computer”. Step 3: Click “Troubleshoot and Advanced Options” and then select “Command Prompt” to launch CMD. Step 4: Now, execute these commands in the same order. bootrec /fixboot bootrec /scanos bootrec /fixmbr bootrec /rebuildbcd 4. Disable Automatic Repair Use the same steps as earlier to launch Command Prompt using Windows Installation media. Then, execute the “bcdedit /set {current} recoveryenabled No” command to turn-off Automatic Repair. While these four methods will help you fix the Windows 10 Automatic Repair loop in almost every situation. Bonus: Recover Data If the Computer Failed to Boot Up (With Recoverit) Download Wondershare Recoverit from our official website: https://recoverit.wondershare.com/ #Wondershare #WondershareRecoveritDataRecovery SUBSCRIBE to get more solutions: https://www.youtube.com/c/RecoveritDa... Follow us on Facebook / recoveritdatarecovery Follow us on Twitter / ws_recoverit Follow us on Instagram / recoverit_datarecovery Follow us on Quora Space: https://www.quora.com/q/recoverit Follow us on our Quora account: https://www.quora.com/profile/Recover...
Comments