Скачать с ютуб The Fiador How to Attach the Fiador to Your Hackamore в хорошем качестве
The Fiador How to Attach the Fiador to Your Hackamore
4 года назад
Из-за периодической блокировки нашего сайта РКН сервисами, просим воспользоваться резервным адресом:
Загрузить через ClipSave.ruСкачать бесплатно The Fiador How to Attach the Fiador to Your Hackamore в качестве 4к (2к / 1080p)
У нас вы можете посмотреть бесплатно The Fiador How to Attach the Fiador to Your Hackamore или скачать в максимальном доступном качестве, которое было загружено на ютуб. Для скачивания выберите вариант из формы ниже:
Загрузить музыку / рингтон The Fiador How to Attach the Fiador to Your Hackamore в формате MP3:
Если кнопки скачивания не
загрузились
НАЖМИТЕ ЗДЕСЬ или обновите страницу
Если возникают проблемы со скачиванием, пожалуйста напишите в поддержку по адресу внизу
страницы.
Спасибо за использование сервиса savevideohd.ru
The Fiador How to Attach the Fiador to Your Hackamore
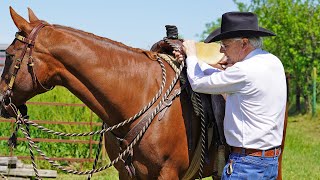
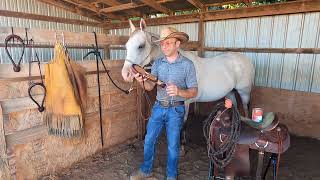
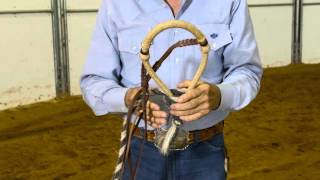
“A fiador is a safety device attached to a hackamore that is similar (find this complete video in the Dennis Moreland Tack blog at https://www.dmtack.com/the-fiador-how...) to a throatlatch on a bridle” says Dennis Moreland of Dennis Moreland Tack. “The fiador https://bit.ly/31qfCTb keeps the hackamore securely on the horse's head. A horse in a hackamore can be ridden, led or tied without the risk of the hackamore being scratched or pulled off, if it has a properly adjusted fiador advises Dennis.” A fiador is made with 1 long piece of doubled over rope that is tied to the hackamore http://bit.ly/2flLbbP with a jug knot at the hackamore's heel knot and a fiador knot at the gullet. These 2 knots stay permanently tied. The fiador is secured to the horse’s head with a sheet bend knot. This is the same knot used in fastening rope halters and the only knot on the fiador you will need to tie and untie each time you ride. It is as easy as tying and untying your rope halter. If you would like to attach a fiador to a hackamore that that doesn’t have a fiador, or, if you ever need to reattach your fiador, follow along with the video and this guideline to make attaching it a breeze: 1. Lay the fiador out flat and hold the jug knot, facing up, in your left hand. 2. Notice the loops at the very bottom of the jug knot. Pull the loops out from under the top 2 strands of cord that are holding the loops in place. 3. Open the center of the jug knot slightly to allow just enough room to place the hackamore’s heel knot through the hole. 4. From the top of the jug knot slide the heel knot through the center hole in the jug knot. 5. Put the loops back under the 2 strands of cord where they were originally. 6. Tighten the jug knot around the heel knot by pulling the loops and the body of the fiador. The next step is to put your hackamore headstall and fiador together. We’re assuming the headstall buckle pieces are already attached to the noseband. If not, attach them now. Put the tail of the fiador up through the slots on the right side of the browband and then back down through the slots on the left side of the browband. Slide the browband keepers against the fiador on each side. Put the headstall crown piece through the browband slots in the same way. Buckle the headstall and adjust the headstall and fiador so they’re level and balanced. The hackamore is supported by and adjusted with the headstall and not with the fiador. The portion of the fiador that prevents the hackamore from accidentally coming off is the loop behind the ears that ends at the fiador knot. This portion should be tied tightly enough that the horse can’t rub the hackamore off but be careful to leave enough slack to get 2-3 fingers between the rope and the head. The rope between the fiador knot and the jug knot should drop straight down. There must be enough length between the jug and fiador knots for the heel knot of the bosal or noseband to be taken up and dropped freely when the rein or mecate is manipulated. If the heel knot swings up and down with each step the length is too long. I make hackamores http://bit.ly/2flLbbP for starting colts, training performance horses, pleasure and trail riding, loping and showing. For safety’s sake, all my hackamores with headstalls come with fiadors https://bit.ly/31qfCTb. If you have questions about hackamores or fiadors, or would like help selecting a hackamore, call 817-312-5305 or write [email protected]. We’re a full-line manufacturer of handmade tack and we’re here to help you!
Comments