Скачать с ютуб How to Install MongoDB on Mac | Install MongoDB on macOS (2024) в хорошем качестве
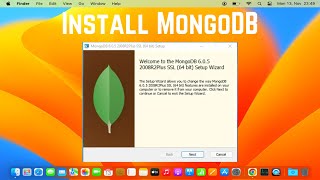
How to Install MongoDB on Mac | Install MongoDB on macOS (2024)
5 месяцев назад
Скачать бесплатно How to Install MongoDB on Mac | Install MongoDB on macOS (2024) в качестве 4к (2к / 1080p)
У нас вы можете посмотреть бесплатно How to Install MongoDB on Mac | Install MongoDB on macOS (2024) или скачать в максимальном доступном качестве, которое было загружено на ютуб. Для скачивания выберите вариант из формы ниже:
Загрузить музыку / рингтон How to Install MongoDB on Mac | Install MongoDB on macOS (2024) в формате MP3:
Если кнопки скачивания не
загрузились
НАЖМИТЕ ЗДЕСЬ или обновите страницу
Если возникают проблемы со скачиванием, пожалуйста напишите в поддержку по адресу внизу
страницы.
Спасибо за использование сервиса savevideohd.ru
How to Install MongoDB on Mac | Install MongoDB on macOS (2024)
🍏📦 *No Homebrew Needed: How to Install MongoDB on Mac (M1, M2, M3, MacBook Pro, MacBook Air) Without Homebrew and Configure in Zsh!* 🚀🖥️ If you prefer not to use Homebrew, you can manually download and install MongoDB on your Mac. Additionally, we'll cover setting up MongoDB in the Zsh shell. 🌟 *Step-by-Step Guide:* 1. *Download MongoDB:* - Visit the official MongoDB website (https://www.mongodb.com/try/download/...) and download the MongoDB Community Server for macOS. 2. *Extract the Archive:* - Once the download is complete, locate the downloaded file (usually a .tgz or .tar.gz archive) and extract it. You can do this by double-clicking on the file or using the terminal: ```bash tar -zxvf /path/to/downloaded/mongodb-osx-ssl-x86_64-4.x.x.tgz ``` 3. *Move MongoDB to /usr/local:* - Move the extracted MongoDB folder to `/usr/local` for easier access: ```bash sudo mv mongodb-osx-ssl-x86_64-4.x.x /usr/local/mongodb ``` 4. *Create Data Directory:* - MongoDB requires a data directory. Create one using: ```bash sudo mkdir -p /usr/local/var/mongodb ``` 5. *Set Permissions:* - Set proper permissions for the data directory: ```bash sudo chown -R $(whoami) /usr/local/var/mongodb ``` 6. *Add MongoDB Binaries to PATH:* - To access MongoDB from any location in the terminal, add the MongoDB binaries to your shell's PATH. If you're using Zsh, edit your Zsh configuration file (usually `~/.zshrc`): ```bash nano ~/.zshrc ``` Add the following line at the end: ```bash export PATH="/usr/local/mongodb/bin:$PATH" ``` Save and exit. 7. *Restart Zsh or Source the Configuration:* - Restart Zsh or source the updated configuration: ```bash source ~/.zshrc ``` 8. *Start MongoDB:* - Start MongoDB by running: ```bash mongod --dbpath /usr/local/var/mongodb ``` 9. *Verify Installation:* - Open a new terminal window and run the MongoDB shell: ```bash mongo ``` You should see the MongoDB shell prompt. 10. *Explore MongoDB:* - You're ready to explore MongoDB! Use commands like `show dbs` and `use your_database_name` to get started. 11. *Stop MongoDB (Optional):* - If you want to stop MongoDB, press *Ctrl + C* in the terminal where MongoDB is running. 🚀 *Additional Tips:* - *Configure MongoDB as a Service (Optional):* - To run MongoDB as a service, create a launch agent plist file. Refer to the MongoDB documentation for detailed instructions. - *Upgrade MongoDB Version:* - To upgrade MongoDB, download the latest version, repeat the installation steps, and replace the old binaries. 🍃 *Congratulations! You've successfully installed MongoDB on your Mac without Homebrew and configured it to work seamlessly with Zsh!* 🍃 *Hashtags:* #MongoDB #MacOS #DatabaseInstallation #TechTutorial #NoHomebrew #ZshConfiguration #DevelopmentEnvironment #ManualInstallation #TechHowTo
Comments
![Installing MongoDB on Mac | Step By Step Guide | MongoDB Shell [mongosh]](https://i.ytimg.com/vi/QEBuMROQuNw/mqdefault.jpg)