Скачать с ютуб Guitar neck build using hand tools only в хорошем качестве
Guitar neck build using hand tools only
3 года назад
Из-за периодической блокировки нашего сайта РКН сервисами, просим воспользоваться резервным адресом:
Загрузить через ClipSave.ruСкачать бесплатно Guitar neck build using hand tools only в качестве 4к (2к / 1080p)
У нас вы можете посмотреть бесплатно Guitar neck build using hand tools only или скачать в максимальном доступном качестве, которое было загружено на ютуб. Для скачивания выберите вариант из формы ниже:
Загрузить музыку / рингтон Guitar neck build using hand tools only в формате MP3:
Если кнопки скачивания не
загрузились
НАЖМИТЕ ЗДЕСЬ или обновите страницу
Если возникают проблемы со скачиванием, пожалуйста напишите в поддержку по адресу внизу
страницы.
Спасибо за использование сервиса savevideohd.ru
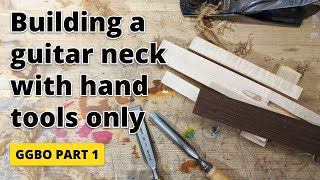
Guitar neck build using hand tools only
In this video I’m building a guitar neck from scratch, using hand tools only. I read about trapezoid guitar neck profiles being used in ergonomic guitars as well as classical instruments, and have been meaning to try one myself for a while now. This build presented the perfect opportunity, so I went with it. I started by squaring the face and one edge of the neck blank. I used the marking gauge to establish a center line, then did the measurements for the scarf joint. Scarf joints strengthen the headstock area by eliminating short grain running through the headstock, while at the same time allowing you to create an angled headstock from a thinner neck blank. This was a rather time consuming cut because of the awkward angle in the vice, and required a lot of planing afterwards to get everything square. Lining the joint up is somewhat tricky. You want it to be straight in order to avoid extra planing - especially since a part of your neck will now consist of end-grain. I drilled holes and used wood screws as guide pins to keep everything lined up properly, before adding more surface pressure with clamps. The truss rod channel was cut using a #44 plough plane using the squared side as a guide. The end-grain was a big challenge here, but by taking super thin shavings I managed to get the bottom of the cavity looking nice and smooth. Now that everything that referenced the square edge was done, it was time to cut the neck to size. After planing it smooth I glued the headstock wings in place. The fretboard radius was established with hand planes, followed by a radius sanding block. I chose indian ebony for the board, which was a pain to work with. The wood is terribly cross-grained and was fighting me in every direction. The fret-slots were cut using a fret slotting jig. This worked well and was a joy to use. The entire fretboard took at most 10 minutes to do and the result was perfect! I can highly recommend getting a quality slotting jig. After cutting the fret slots it was time to position the fretboard on the neck. Luckily I still had clearly visible center lines on both pieces, which made alignment easy. I drilled 2mm holes for guide pins (aka toothpicks), which were essential for all the measuring and sizing that followed. Sizing the fretboard was a pretty laborious process, that involved planing the board to width three times. In the end, I had two neat parallel binding channels running down the fretboard though. I had to touch up the fretboard radius with the radius sanding block again. I sanded the fretboard to 1000 grit before fretting, since it would be much more difficult to do it once the frets were in. After cutting the frets to size and nipping the tangs to clear the binding, I pressed the frets in using a 1920’s arbor press that I restored (video here: • Arbor press restoration using hand to... ). Once installed I cut the ends back and filed them flat before moving on to the neck profile. To create the neck profile, I first cut the thickness of the neck with a saw, then marked out the geometry of the neck profile. I wanted to try a trapezoid profile after reading a lot about geometric guitars and necks, and being inspired by the likes of Strandberg and Rick Toone. I’m very happy with the end result, and will play around with the idea more in future. Next was fretwork. I filed the fret ends with a fret leveling file before leveling the frets with a leveling beam. Then I crowned the frets with a fret crowning file before polishing them with sandpaper and fret polishing rubbers. Happy with the fretwork I moved on to the headstock. The shape was inspired by my Ibanez SZ series, just smaller. I drilled the tuner holes with my vintage Ixion hand cranked drill press. It is a little bit wobbly and needs a better table, but overall it works great! Finally I added the side dot markers before spending many hours off-camera sanding the neck. I applied 6 coats of Tru-Oil to the neck, and some lemon oil to the fretboard. Timestamps: 0:16 - Squaring the neck blank 0:40 - Cutting the scarf joint 2:02 - Thicknessing the headstock 3:03 - Scarf joint glue-up 4:30 - Truss rod channel 6:30 - Cutting the neck 8:07 - Cutting and gluing headstock wings 9:50 - Planing and radiusing the fretboard 11:18 - Cutting the fretboard to size 12:00 - Cutting fret slots with a miter jig 12:55 - Fretboard sizing 14:35 - Fretboard binding 15:55 - Trimming the binding 17:50 - Installing frets with the arbor press 19:50 - Thicknessing the neck 21:15 - Creating trapezoid neck profile 23:57 - Fret ends and fret leveling 25:23 - Crowning and polishing frets 26:24 - Cutting the headstock shape 28:45 - Drilling tuner holes 30:07 - Adding side dots 31:10 - Final reveal If you have any question about the process, the press itself or the materials used, please leave a comment. Also please add any suggestions on improvements or better workflows! Subscribe for more content!
Comments