Скачать с ютуб Project Folder for Cross Stitch, Tutorial в хорошем качестве
Project Folder for Cross Stitch, Tutorial
1 год назад
Из-за периодической блокировки нашего сайта РКН сервисами, просим воспользоваться резервным адресом:
Загрузить через ClipSave.ruСкачать бесплатно Project Folder for Cross Stitch, Tutorial в качестве 4к (2к / 1080p)
У нас вы можете посмотреть бесплатно Project Folder for Cross Stitch, Tutorial или скачать в максимальном доступном качестве, которое было загружено на ютуб. Для скачивания выберите вариант из формы ниже:
Загрузить музыку / рингтон Project Folder for Cross Stitch, Tutorial в формате MP3:
Если кнопки скачивания не
загрузились
НАЖМИТЕ ЗДЕСЬ или обновите страницу
Если возникают проблемы со скачиванием, пожалуйста напишите в поддержку по адресу внизу
страницы.
Спасибо за использование сервиса savevideohd.ru
Project Folder for Cross Stitch, Tutorial
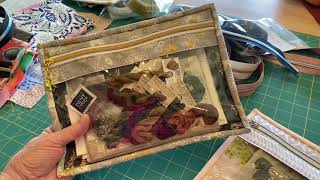
Welcome to the Project Folder tutorial! Today's video I will show you how I cut, quilt, sew and assemble this project folder. Supply list and written instructions listed below! Stay in Touch! Instagram - / elizabethanncanstitch Email - elizabethanncanstitch AT gmail.com Supplies: 1/2 yard of fabric for main body exterior and interior fat quarter of fabric for chart pocket (can substitute vinyl instead) fat quarter or traditional 1/4 yard of fabric for bindings and closure light to medium weight interfacing, I used Pellon SF101 foam interfacing, I used Bosal foam double sided fusible 16 inch zipper sew in magnetic closure *Links to supplies used: ByAnnie Purse Zippers: By Annie purse zippers - https://shrsl.com/43iya ByAnnie Magnetic closure - https://shrsl.com/44lfy Frixion Heat Erasable Pen - https://shrsl.com/44lg1 Bosal Double sided Fusible stabilizer - https://shrsl.com/44lg7 Instructions: Make the main body exterior and interior quilted panel cut two pieces of fabric 14.5 x 22 inches cut one piece of foam interfacing 14.5 x 22 inches Sandwich your foam between the fabrics, wrong sides together and quilt through all layers Trim this quilted piece to 13.5 x 21.5 inches Cut the rest of the pieces of the bag 3 - 2 x 13.5 inch strips of pocket binding 2 - 2 x 6 inch strips of fabric for magnet closure 2 - 2 x 6 inch strips of interfacing for magnet closure 1 - 2 x 2 inch square for magnet cover 1 - 9 x 13.5 inch piece of vinyl for pocket 2 - 10.5 x 13.5 inch pieces of fabric for chart pocket 1 - 10.5 x 13.5 inch piece of interfacing for chart pocket cut 80 inches of 2.25 inch binding strips for the outside of the bag Add magnet closure to front of bag mark a 1 inch square centered top to bottom, 1.5 inches from outside edge of bag use the 2 inch square and iron all sides in 3/8 of an inch glue your magnet onto the fabric patch and top stitch in place on the square you marked earlier Make your pocket bindings for the 3 - 2 x 13.5 inch strips, fold in half and press open back up flat and fold each edge into the center, keep the edge about 1/8 inch away from center fold fold the strip in half and press again to finish making binding Make fabric chart pocket fuse interfacing to wrong side of one piece for chart pocket layer the other piece of fabric with the interfaced piece, wrong sides together attach binding to top edge of pocket by top stitching into place baste pocket into place on main body of bag, lining up the top of the pocket with the line we stitched half an inch from the center of the bag Make vinyl pocket attach binding to top edge of vinyl by top stitching into place top stitch the pocket onto the lower edge of your zipper attach binding to the top edge of the zipper attach vinyl pocket to main body of bag, lining up the top of the pocket with marked line, half inch to the right from the center of the bag and top stitch into place baste the other 3 sides of the bag in place, 1/8th inch away from edge of bag trim any overhang from edges of pockets and set main body aside Make tab closure iron interfacing onto 2- 2 x 6 inch pieces of fabric sew magnet to wrong side of one of the pieces of fabric sew the two pieces of fabrics together, right sides together on 3 sides, leaving the bottom open for turning turn the tab, poke our your corners, press flat and top stitch 1/8th inch on 3 sides trim your finished tab to 5 inches long (or your preferred length) baste tab to wrong side of bag, lining up the raw edge of the tab with the magnet facing up Bind the bag make 80 inches of 2 1/4 inch binding start your binding on the fabric pocket side to make it easier to join your ends sew binding on from inside of bag first, join your ends and then top stitch the binding in place from the front of the bag *some links above are affiliate links and I may earn a small commission if you purchase something through one of those links, thanks! Video Contents 00:00:00 Intro 00:00:30 Supplies 00:02:11 Making the main body piece 00:12:38 Creating the spine of the folder 00:17:25 Cutting out pockets and binding 00:23:56 Making pocket bindings 00:25:49 Adding magnet to front 00:34:46 Making chart pocket 00:37:13 Making vinyl pocket 00:44:56 Magnetic tab closure 00:53:35 Binding and finishing the folder 01:06:27 Finished bag
Comments