Скачать с ютуб How to remove door panel on Chrysler 200 & Sebring & Avenger 2007 to 2014 (EP 240) в хорошем качестве
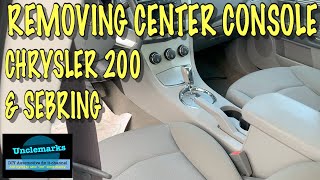
How to remove door panel on Chrysler 200 & Sebring & Avenger 2007 to 2014 (EP 240)
2 года назад
Из-за периодической блокировки нашего сайта РКН сервисами, просим воспользоваться резервным адресом:
Загрузить через ClipSave.ruСкачать бесплатно How to remove door panel on Chrysler 200 & Sebring & Avenger 2007 to 2014 (EP 240) в качестве 4к (2к / 1080p)
У нас вы можете посмотреть бесплатно How to remove door panel on Chrysler 200 & Sebring & Avenger 2007 to 2014 (EP 240) или скачать в максимальном доступном качестве, которое было загружено на ютуб. Для скачивания выберите вариант из формы ниже:
Загрузить музыку / рингтон How to remove door panel on Chrysler 200 & Sebring & Avenger 2007 to 2014 (EP 240) в формате MP3:
Если кнопки скачивания не
загрузились
НАЖМИТЕ ЗДЕСЬ или обновите страницу
Если возникают проблемы со скачиванием, пожалуйста напишите в поддержку по адресу внизу
страницы.
Спасибо за использование сервиса savevideohd.ru
How to remove door panel on Chrysler 200 & Sebring & Avenger 2007 to 2014 (EP 240)
I remove the door panel on this Chrysler 200 / Sebring. Video uploaded Feb 12, 2022. 🔷 SKIPPABLE CHAPTERS BELOW 🔷 ☕🍩 If this video helped you & you would like to make a modest donation to the channel, why not buy me a coffee & donut? If you feel you want to give more because you see the value in this video, you can donate what ever you wish to help this channel grow! Thanking you in advance! https://paypal.me/unclemarksdiyauto?l... 🍩 ☕ Paid link: 🛒 USA Amazon product links: 🔧 Door panel tools: https://amzn.to/3MlmIyQ or better clip tool: https://amzn.to/3pwJ9rf 🔧 Torx bit screw drivers set: https://amzn.to/3pNiBmA 🔧 Torx bit socket set: https://amzn.to/2XVjOg7 🤷 Auto repairs for dummies: https://amzn.to/3w318ay 🤷 Chilton repair manual N/A at this time. 🤷 Haynes repair manual 2007-2014 Chrysler & 200 & 2007-2014 Avenger https://amzn.to/3HynAg As an Amazon Associate I earn from qualifying purchases. 🔷 SKIPPABLE CHAPTERS 🔷 0:00 intro. 0:30 Location of mounting screws. 0:45 Removing mirror bolt cover. 1:19 Removing screw behind door handle & size. 1:55 Removing door handle screws & size. 3:00 Location of the 10 door panel clips. 3:14 Removing door clips. 3:35 Peek behind panel looking at clips. 4:00 Don't forget that 2 clips at top. 4:10 Removing panel. 4:30 Door handle cable. 5:35 Removing switch wire connectors. 6:48 Re-installing door panel. 7:14 Installing wires for switches. 8:00 Installing door handle cable & clip. 8:37 How to install panel with top lip & window rubber. 9:10 Understanding how to line up door panel clips. 10:10 installing door armrest screws. 10:56 Installing door handle screw. 11:19 install mirror mounting screw cover. 11:44 Outro & plug for project time garage. 13:31 Bonus footage / out takes. 14:23 End cars to other videos. ⚠️-Disclaimer: Due to factors beyond the control of unclemark, I cannot guarantee against improper use or unauthorized modifications of this information. Unclemark assumes no liability for property damage or injury occurred as a result of any of the information contained in this video. Use of this information is at your own risk. Unclemark recommends safe practices when working on vehicles and or with tools, lifting tools, jacks and or jack stands, chemicals and or lubricants or anything else seen or implied in this video. Due to factors beyond the control of unclemark, no information contained in this video shall create any expressed or implied warranty or guarantee of any particular result. Any injury, damage, or lost that may result from improper use of these tools, equipment, or from the information contained in this video is the sole responsibility of the user and not of unclemark. 🛒 -Links on this video to products are for informational purposes only and in no way are a endorsement of the safety or effectiveness of the particular product. 🔧-You should consult a qualified mechanic for your repairs. Statements made in this video are not intended as mechanical advice.
Comments