Скачать с ютуб How to make your own wax seal stamp and wax-2 EN в хорошем качестве
How to make your own wax seal stamp and wax-2 EN
2 года назад
Скачать бесплатно How to make your own wax seal stamp and wax-2 EN в качестве 4к (2к / 1080p)
У нас вы можете посмотреть бесплатно How to make your own wax seal stamp and wax-2 EN или скачать в максимальном доступном качестве, которое было загружено на ютуб. Для скачивания выберите вариант из формы ниже:
Загрузить музыку / рингтон How to make your own wax seal stamp and wax-2 EN в формате MP3:
Если кнопки скачивания не
загрузились
НАЖМИТЕ ЗДЕСЬ или обновите страницу
Если возникают проблемы со скачиванием, пожалуйста напишите в поддержку по адресу внизу
страницы.
Спасибо за использование сервиса savevideohd.ru
How to make your own wax seal stamp and wax-2 EN
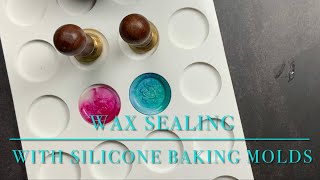
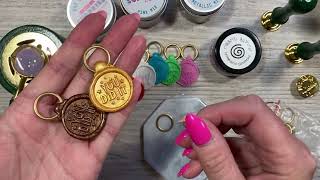
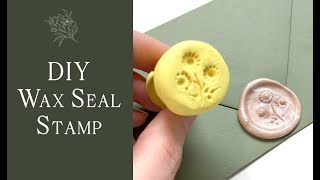
Today, I'm making a wax seal stamps and wax seal stick, using only what I have at home such as old buttons, mismatched pieces of chess, broken wax pencil in half, glue gun sticks etc... It's great to customize gift wrapping. Holiday cards. Antique Valentine’s Day Cards. Mother's Day card and much more. Timecode 0:00 Intro 0:10 The chape ou want to print 0:28 Chap with holes 0:47 Cameo chap 1:09 Cooking polyer clay 1:49 Test the seal 4:48:28 Glitter 5:13 1st wax recipe 5:42 Make wax stick 5:47:44 2nd wax recipe Hello, my name is Brigitte, I am passionate about creating project using budget friendly products or recycle product. I hope you like this video. If so, please take the time to LIKE, COMMENT, SHARE and SUBSCRIBE to my channel not to miss my next video! Thank you! Good DIY and see you next time. Hello welcome to my channel, my name is Brigitte and today I will make seal stamps and two wax recipes. I start by finding the shapes that I want to print on my wax seal. For the button that have holds, I fill the holes with polymer clay to prevent the wax from getting stock in the seal. it’s better to use a metal button because I must cook the clay in the oven. Here I print in my polymer clay the chape of the cameo. That I have previously oiled to help the relies. Cook in a regular oven Bake on an oven proof metal surface at 275F (130c) for 15 minutes per ¼ inches (6 mm) thickness. DO NOT MICROWACE. DONOT OVERBKE TO AVEOID BURNING CLAY. Baking should be completed by an adult. Wash hands after use. The cooking time may vary the company to company. I always test my seal in wax before adding a handle. Depending on the seal I make a thick wax recipe or less thick wax recipe. To add the handle, I use hot glue. The polymer clay can make the demolding difficult so put the seal on an ice pack and add oil on it before using it. Here with button, hut glue and chess piece we have a seal stamp. Here I have glittering powder that I use a lot of projects. There are washable, no toxic and come in many colors. You can mix them with all kinds of medium. I mix the powder (50%) with the wax (50%). Then add same quantity of glue. The glue gives the wax flexibility and prevents cracks. With the left over, I make wax stick ready to use. For this recipe I use left-over candle, gold glitter and hot glue. Thanks, you for watching. #TodaywithBrigitte #DIY #Howto #creativeproject #makewaxsealstamp
Comments