Скачать с ютуб Customize Your Steam Deck: JSAUX Transparent Front Cover PC0108 Installation Tutorial (new) в хорошем качестве
Customize Your Steam Deck: JSAUX Transparent Front Cover PC0108 Installation Tutorial (new)
6 месяцев назад
Из-за периодической блокировки нашего сайта РКН сервисами, просим воспользоваться резервным адресом:
Загрузить через ClipSave.ruСкачать бесплатно Customize Your Steam Deck: JSAUX Transparent Front Cover PC0108 Installation Tutorial (new) в качестве 4к (2к / 1080p)
У нас вы можете посмотреть бесплатно Customize Your Steam Deck: JSAUX Transparent Front Cover PC0108 Installation Tutorial (new) или скачать в максимальном доступном качестве, которое было загружено на ютуб. Для скачивания выберите вариант из формы ниже:
Загрузить музыку / рингтон Customize Your Steam Deck: JSAUX Transparent Front Cover PC0108 Installation Tutorial (new) в формате MP3:
Если кнопки скачивания не
загрузились
НАЖМИТЕ ЗДЕСЬ или обновите страницу
Если возникают проблемы со скачиванием, пожалуйста напишите в поддержку по адресу внизу
страницы.
Спасибо за использование сервиса savevideohd.ru
Customize Your Steam Deck: JSAUX Transparent Front Cover PC0108 Installation Tutorial (new)
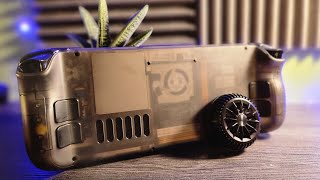
The Latest Version 🪛To minimize damage to the unit, please open the text version to follow along with the video during installation. The text version contains more details: https://jsaux.com/pages/pc0108-instal... 🛒Get more Steam Deck accessories from JSAUX: https://jsaux.com/collections/steam-d... 💗Welcome to this tutorial video, where we provide step-by-step guidance for the precise and flawless installation of the PC0108 transparent front cover for the Steam Deck. This installation process is complex and requires the utmost care and attention. From tool preparation to meticulous transparency adjustment, we'll walk you through every detail. Enhance the design of your Steam Deck while experiencing the intricacies of this intricate installation. Let's make your Steam Deck a true masterpiece together! 00:02 Preparation 00:17 Remove the back cover 01:32 Remove the shielding cover 01:56 Remove the power cable, fan cable, and display cable 02:14 Remove other cables 04:06 Remove the motherboard screws 04:35 Flip the motherboard 04:44 Remove the screen cable 05:00 Secure the motherboard 06:02 Remove the left and right triggers 06:24 Internal screw display 06:26 Remove the right trigger bracket 06:55 Remove the right joystick 07:29 Remove the right button circuit board 08:14 Remove the left joystick 08:44 Remove the left trigger bracket 09:14 Remove the left button circuit board 09:52 Remove the right shoulder button assembly 10:07 Remove the right touchpad circuit board 10:40 Remove the quick access key 10:47 Remove the screws on the right touchpad 11:24 Remove the action button 11:42 Remove the left shoulder button assembly 11:55 Remove the left touchpad circuit board 12:20 Remove the screws on the left touchpad 12:56 Remove the D-pad 13:14 Remove the Steam button 13:18 Precautions for removing the screen 14:29 Heat up the screen adhesive 14:45 Cut the screen adhesive 15:44 Replace the screwdriver head 16:25 Remove the front side screw of the middle frame 16:59 Remove the back side screw of the middle frame 17:35 Remove the middle frame 18:05 Remove the touchpad 18:16 Remove the microphone ribbon cable 18:41 Remove the power button and volume button 18:52 Install the power button and volume button 19:10 Install the microphone ribbon cable 19:30 Install the left touchpad 20:43 Install the right touchpad 21:27 Install the middle frame 22:35 Secure the rear screws of the middle frame 23:39 Secure the front screws of the middle frame 25:08 Paste the screen back adhesive 27:05 Install the screen 27:41 Install the right shoulder key assembly 28:50 Install the screen ribbon cable 30:13 Install the quick access key 30:28 Install the right touchpad circuit board 31:25 Install the right button circuit board 32:32 Install the right joystick 33:37 Install the right side ribbon cable 34:46 Install the right trigger bracket 35:23 Install the right trigger 35:33 Install the left shoulder button assembly 36:39 Install the Steam button 37:08 Install the left touchpad circuit board 38:26 Install the left button circuit board 39:56 Install the left joystick 40:56 Install the left ribbon cable 42:12 Install the left trigger bracket 42:58 Install the left trigger 43:04 Install the important ribbon cable 43:30 Install the shield 44:26 Install the rear cover
Comments