Скачать с ютуб BLEACHING MY HAIR BROWN TO BLONDE at home EXTREME transformation в хорошем качестве
BLEACHING MY HAIR BROWN TO BLONDE at home EXTREME transformation
1 год назад
Скачать бесплатно BLEACHING MY HAIR BROWN TO BLONDE at home EXTREME transformation в качестве 4к (2к / 1080p)
У нас вы можете посмотреть бесплатно BLEACHING MY HAIR BROWN TO BLONDE at home EXTREME transformation или скачать в максимальном доступном качестве, которое было загружено на ютуб. Для скачивания выберите вариант из формы ниже:
Загрузить музыку / рингтон BLEACHING MY HAIR BROWN TO BLONDE at home EXTREME transformation в формате MP3:
Если кнопки скачивания не
загрузились
НАЖМИТЕ ЗДЕСЬ или обновите страницу
Если возникают проблемы со скачиванием, пожалуйста напишите в поддержку по адресу внизу
страницы.
Спасибо за использование сервиса savevideohd.ru
BLEACHING MY HAIR BROWN TO BLONDE at home EXTREME transformation
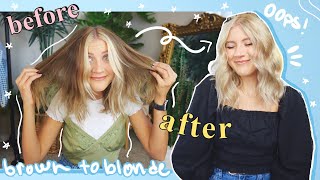
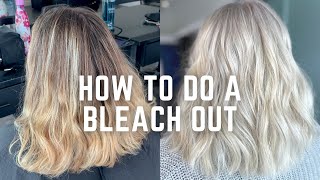
Disclaimer: I am a professional hairdresser, I completely forgot to say because I talk about it so often on my channel, but just for anyone that’s new here, I am a professional and I’m just showing what works for me :) x Welcome back to my channel, where today I'll be sharing with you how I transformed my hair from brown to blonde using the back to back slice highlighting technique. In this video, I'll be taking you through a detailed step-by-step process on how I highlighted my hair, the products I used, and why I chose L'Oreal Studio Blonde 8 Multi-Techniques to achieve a natural-looking blonde colour. Products used: Olaplex https://amzn.to/3UG0lZB https://amzn.to/3zZUZyQ L'Oreal Studio Blonde 8 Multi-Techniques: https://amzn.to/3UEbvOx 20 Volume Developer: https://amzn.to/3MJHQSg Foils: https://amzn.to/3myg5Bg Tail Comb: https://amzn.to/41vRa00 Colour Bowl and Brush: https://amzn.to/3och76w Step by Step Instructions: To start, I parted my hair into three sections. The first parting was ear to ear, and the second was above the occipital bone. Beginning with the first section at the bottom of my head, behind my ear, I took a small section of hair and placed it on a foil. In a colour bowl, I mixed L'Oreal Studio Blonde 8 Multi-Techniques with 20 volume developer. This particular bleach is perfect for achieving multiple blonde shades, making it an ideal choice for back to back slice highlighting. Using a tail comb, I applied the mixture to the small section of hair, making sure to coat it thoroughly from root to tip. After applying the mixture, I placed the foil over the section of hair and folded it over, securing it in place. I repeated this process, working my way back until the bottom section was complete. Once the first section was finished developing, I removed the foils as and when that section was done, rather than waiting for all of them to finish developing. I then repeated the same process on the next section and continued until all the hair in that section was in foil. I left the mixture on until the colour lifted to the desired shade, checking it regularly. After washing my hair with shampoo, I applied Olaplex part 2 to my hair, which helps to strengthen and protect the hair after bleaching. Products You Will Need: L'Oreal Studio Blonde 8 Multi-Techniques 20 Volume Developer Foils Tail Comb Colour Bowl Colour Brush Olaplex Part 1 and Part 2 Conclusion: Overall, using L'Oreal Studio Blonde 8 Multi-Techniques and the back to back slice highlighting technique allowed me to achieve a beautiful blonde transformation. Additionally, incorporating Olaplex part 1 and 2 helped to maintain the health and strength of my hair. I hope this video has been helpful, and if you have any questions or comments, please leave them down below. Don't forget to follow me on my social media for more hair and beauty content: Facebook: / rachelmckx Instagram: / rachelmckx TikTok: / rachelmckx Twitter: / rachelmckxx
Comments