Скачать с ютуб Generative Fill for Video: Transforming Subjects with AI | After Effects & Photoshop Tutorial в хорошем качестве
Generative Fill for Video: Transforming Subjects with AI | After Effects & Photoshop Tutorial
7 месяцев назад
Скачать бесплатно Generative Fill for Video: Transforming Subjects with AI | After Effects & Photoshop Tutorial в качестве 4к (2к / 1080p)
У нас вы можете посмотреть бесплатно Generative Fill for Video: Transforming Subjects with AI | After Effects & Photoshop Tutorial или скачать в максимальном доступном качестве, которое было загружено на ютуб. Для скачивания выберите вариант из формы ниже:
Загрузить музыку / рингтон Generative Fill for Video: Transforming Subjects with AI | After Effects & Photoshop Tutorial в формате MP3:
Если кнопки скачивания не
загрузились
НАЖМИТЕ ЗДЕСЬ или обновите страницу
Если возникают проблемы со скачиванием, пожалуйста напишите в поддержку по адресу внизу
страницы.
Спасибо за использование сервиса savevideohd.ru
Generative Fill for Video: Transforming Subjects with AI | After Effects & Photoshop Tutorial
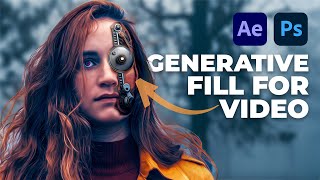
Learn how to create realistic zombie makeup using After Effects in this step-by-step tutorial. Follow along as we transform a concerned-looking character into a zombie with creepy eyes, textured skin, and detailed facial features. Discover the secrets of tracking and compositing to bring your zombie makeup to life. Perfect for filmmakers, digital artists, and anyone looking to enhance their After Effects skills!" 🍿 WATCH NEXT: 1. Using After Effects Content-Aware Fill with Generative Fill | AI Video Tutorial - • Using After Effects Content-Aware Fil... 2. Elevate Your Videos with Generative Fill and Motion Tracking | Photoshop & After Effects Tutorial - • Elevate Your Videos with Generative F... 3. Fixing Microphone Audio Plosive Pops in Post | Adobe Audition Tutorial - • Fixing Microphone Audio Plosive Pops ... MY OTHER SOCIALS: 🌍 My website - http://LinesToDesigns.Co 🐦 Twitter - / lines2designs 📸 Instagram - / linestodesigns 🎥 Facebook - / linestodesignsco ⌚️Timestamps: (00:00) Intro & Process Explanation (07:12) Exploring Clip & Frame Saving (19:06) Selecting Pupils & Eye Alteration (37:02) Creating Bacteria & Zombie Rashes (01:01) Isolating & Importing Assets (01:21) Motion Tracking in Mocha AE (02:54) Reviewing & Saving Tracked Data (03:18) Applying Track Results (03:33) Final Review #AfterEffectsTutorial #PhotoshopTutorial #GenerativeFill #VideoEditing #AIinDesign #CreativeEffects #MotionTracking #VisualEffects #DigitalArtTutorial #AnimationTips #EditingTechniques #ArtificialIntelligence #YouTubeTutorials #CreativeProcess #VideoProduction 💬 Transcript You want to know how we made this using generative fill in After Effects. We'll follow along. And I'll show you. I have a clip here of a girl who looks a little concerned. Very dramatic shot. I'm going to save frame as file and render. So I'm going to bring that into Photoshop, hit select and mask, and start selecting out her pupils. Let's just expand this about five pixels. Then I'm going to hit generative fill and type in Pearl White zombie, scary eyes. Okay, that's not too scary. Let's try generating again. We'll go with that. From here, I'm going to create some nice, fleshy bacteria growing on her face. I'm going to type in zombie skin rashes and try to be more specific. Textured. I like that. Now that I have all my composites generated, I'm going to jump ahead here. I have isolated all of my assets into separate layers and bring that into After Effects as a composition. Jumping back into After Effects, import as a composition, and you can see it falls in the perfect spot. I'm going to go into this pre-comp and bring these individual layers back into the main comp. Change the blending modes in some of my layers to make them blend into the skin a lot better. Now obviously, now we need a motion track. To do that, I'm going to animation track and Boris affects MOCA. MOCA will open up, and from here, I'll grab the explained tool. I'm going to track a few different spots on her face. First, I'll start with the eyes, selecting a few different high contrast spots. Click on perspective, show surface, and align surface. Then track forward. That's pretty good. Label this one eyes and go ahead with the other one. I'm going to do this on the forehead, selecting some high contrast spots again. Now I'm going to track her cheek. I'm going to actually select her collar, basically in line with her neck, which doesn't have enough information to track. Just do her other cheek. Once I have all my tracks, good to go, I'm going to hit the save button and close out of MOCA. Then when I go back into After Effects, I'm going to my tracking data and click on Create Track Data. I'm going to click on Eyes and then export. It doesn't look like anything happens, but if I hit play, you see the eyes are tracking perfectly. Now I'm going to apply each track layer with each corresponding layer. Now I have all my tracking data inserted. It's matching the noise really nicely. I don't actually have to add any noise to these layers. Before I show you the final result, some final changes I made: I masked out part of the bruise here to make it look like more of a scratch. And I created this growth effect by using the native effect burn film and animating each layer in. Here's the final result. ___________________ 📧 For Sponsors: [email protected] Download My Media Kit - https://bit.ly/LTD_MediaKit ___________________
Comments