Скачать с ютуб Stick Welding A Simple But Sturdy Workbench в хорошем качестве
Stick Welding A Simple But Sturdy Workbench
5 лет назад
Скачать бесплатно Stick Welding A Simple But Sturdy Workbench в качестве 4к (2к / 1080p)
У нас вы можете посмотреть бесплатно Stick Welding A Simple But Sturdy Workbench или скачать в максимальном доступном качестве, которое было загружено на ютуб. Для скачивания выберите вариант из формы ниже:
Загрузить музыку / рингтон Stick Welding A Simple But Sturdy Workbench в формате MP3:
Если кнопки скачивания не
загрузились
НАЖМИТЕ ЗДЕСЬ или обновите страницу
Если возникают проблемы со скачиванием, пожалуйста напишите в поддержку по адресу внизу
страницы.
Спасибо за использование сервиса savevideohd.ru
Stick Welding A Simple But Sturdy Workbench
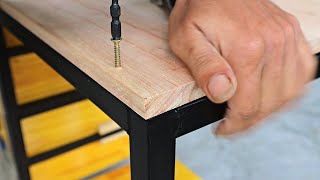
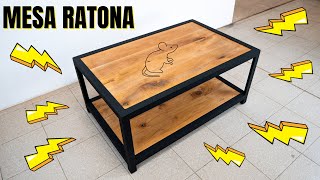
A square particle board and two saw horses don't make a great workbench, I know! I really needed to make myself a proper sturdy one, so in this video you can see how I went about it. The design is super simple but the 50mm square tubing I bought with 3mm thick walls makes this construction pretty solid! As you can see from my ugly welds I am no expert about stick welding or any other welding and the super cheap welder I have probably don't help either (fun fact, don't trust the rod rating on a 40€ machine, it can't weld with 2.5 rods! Too bad I discovered after buyng 200). Anyway, with 2mm rods I was able to get a deep and solid weld! At the end this workbench is pretty heavy and can stand me(90kg) walking on top of it without flexing. It's also a bit high at 1m compared to most workbench I see around, that's just my preference, I like to stand straight. And I almost fogot: the workbench measure 185x80cm. I think that's all I need to say! Feel free to ask me more information in the comments. Index of operation and materials: 0:17 Test cut to see if the cut angle is set to 45° 1:10 Beveling edges that receive weld to help with penetration 1:44 Tack welding everything in place, it should help to avoid distortion cause by too much heat from a thick weld 2:30 After all sides are tacked I go over everything with full weld 3:13 Grinding flat to weld legs on top 3:40 Cutting legs 4:10 Welding legs with the help of square magnets and tack welds 4:40 Also checking for squareness before full welds 4:45 Closing corners and rounding with grinder 5:30 Cutting angle bar for the middle shelf 5:42 Two cut offs made for perfect spacers at 40cm from the top 6:04 Cutting feet material from scrap steel 6:33 Rounding corners and edges on the 2x72 belt grinder 6:57 Wire wheel removes rust like nothing else 7:10 Tack welding the feet, no need for full welds here, I think there won't be any stress to this joint 8:11 Cold blueing the frame (I degreased off camera). Turned out to be more of an antiquing than blue but I'm cool with that! 8:23 Spray clear coat all over the frame 9:08 Cutting to size a 2cm thick particle board as base for the top laminated board 9:45 Drilling holes in the frame and tapping for M5 bolts. I used 16 bolts to play it safe 10:20 Screweing the top laminated 2cm thick particle board from the bottom so no fasteners are left visible on the top 10:30 Bottom shelf made of a single 2cm thick particle board, cut to size and corners notched off camera 10:40 Again, I weight 90kg, super happy with how solid it came out! Thanks a lot for watching, I hope you liked the video! Suggestions and comments are welcome. Leave a like and share to anyone who might be interested! ★Patreon★ / blackbeardprojects ★Website★ http://blackbeardproject.com/ ★Follow me★ Facebook ► / blackbeardprojects Twitter ► / blackbeardproje Instagram ► / black_beard_projects
Comments