Скачать с ютуб Wall Train Track DIY ( в хорошем качестве
Wall Train Track DIY (
10 лет назад
Скачать бесплатно Wall Train Track DIY ( в качестве 4к (2к / 1080p)
У нас вы можете посмотреть бесплатно Wall Train Track DIY ( или скачать в максимальном доступном качестве, которое было загружено на ютуб. Для скачивания выберите вариант из формы ниже:
Загрузить музыку / рингтон Wall Train Track DIY ( в формате MP3:
Если кнопки скачивания не
загрузились
НАЖМИТЕ ЗДЕСЬ или обновите страницу
Если возникают проблемы со скачиванием, пожалуйста напишите в поддержку по адресу внизу
страницы.
Спасибо за использование сервиса savevideohd.ru
Wall Train Track DIY (
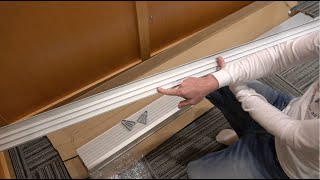
Garden train build: • Building a Outdoor Garden Train Various train sets: https://amzn.to/3dyurId Due to requests, I am now including links to products when possible. These links are provided for reference, no company or individual paid to be in this video. Depending on the vendor, a small commission might be paid and would be used to support adding content to this channel. Amazon Prime free 30 day trial: https://amzn.to/3g9mwCL Train sets have been popular for a long time but they’re not just for kids. A lot of adults collect trains. The only problems I there’s a lot of track laying around the house and if you have company coming over or maybe you’re through playing with the train you have to pick all that track up. But a great do it yourself project for train enthusiasts is to mount the track along the wall of a room in your house. WHAT YOU'LL NEED: Train set Drill driver lumber tape measure builder’s square pencil saber saw paint level L brackets mounting screws trim wood The first step is to take exact measurements of the space where you train track will be mounted. The first measurement is for the corner shelves where the train will make its turns in the corners.You want to mount these shelves into the wall studs so that they’re securely in place. So find the studs where you’ll mount the shelves and then measure to the corner. This will tell you how wide to make the corner shelves. Next measure the length of the walls for the wall shelves minus the width of the corner shelves. Get your lumber and you’re ready to begin. Next measure mark and cut your boards. You can use a builder’s square to mark them so that you are assured of a good straight line for your cut. For the corner shelves you can best make the cut using a saber saw. Once your boards are cut, it’s a good idea to go ahead and paint them before you put them up. Once your boards are dry, it’s time to determine where on the wall to hang them. If you have a window in the room, the track will obviously have to run above it. In our case, the distance from the ceiling to the window was seven and a half inches. Since our shelving was ¾” thick, we deducted that from seven and a half inches and got 6 and ¾”. Mark that spot and then make other marks on the walls around the room. Use a level to draw a line to connect the dots so that your tracks will be level. Now you’re ready to install the mounting brackets into the studs. Measure down from the line you’ve drawn around the room the thickness of your shelves, again in our case it was ¾” thick. Then add to that the screw position of the mounting brackets. In our case it was an inch and a half, leaving us making a mark two and ¼” below the line. Mark that and that’s where you screw the mounting bracket to the stud. In the corners, attach an L bracket to the shelf and mount that into the stud in the corner so your shelves won’t slip down the wall. Now you can use a ½” screw to attach the track to the shelves and you’re almost done. Once the shelves are up, you can add decorative wood trim to cover the seams where the shelves come together plus it gives the project a much nicer look. Segment #5153 from "Michael Holigan's Your New House" Home Improvement TV Show
Comments