Скачать с ютуб Embroidering 60 patches in just 24 HOURS??? в хорошем качестве
Embroidering 60 patches in just 24 HOURS???
2 года назад
Из-за периодической блокировки нашего сайта РКН сервисами, просим воспользоваться резервным адресом:
Загрузить через ClipSave.ruСкачать бесплатно Embroidering 60 patches in just 24 HOURS??? в качестве 4к (2к / 1080p)
У нас вы можете посмотреть бесплатно Embroidering 60 patches in just 24 HOURS??? или скачать в максимальном доступном качестве, которое было загружено на ютуб. Для скачивания выберите вариант из формы ниже:
Загрузить музыку / рингтон Embroidering 60 patches in just 24 HOURS??? в формате MP3:
Если кнопки скачивания не
загрузились
НАЖМИТЕ ЗДЕСЬ или обновите страницу
Если возникают проблемы со скачиванием, пожалуйста напишите в поддержку по адресу внизу
страницы.
Спасибо за использование сервиса savevideohd.ru
Embroidering 60 patches in just 24 HOURS???
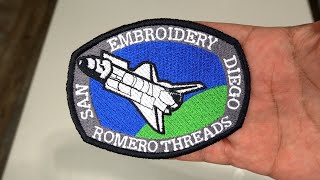
In this smoking hot Embroidery Hub episode, Willy custom embroiders 60 Richardson caps and patches for a local fire station. He also uses Chroma Luxe to recreate an almost 100-year-old patch. To see how he embroidered this vintage patch and quickly fulfilled this huge order, make sure to watch this video all the way until the end! Click here to learn how to sew a patch on a cap: • How to Sew a Leather Patch on a Cap –... Click here to learn about the different ways to attach a patch to a cap: • Видео Learn more about Ricoma embroidery machines here: https://hubs.ly/H0mthNk0 Check out Chroma Luxe and all its capabilities here: https://ricoma.com/US/software/chroma Get your own Ricoma Flat Heat Press here: https://shop.ricoma.com/products/hp-1... Get your own Ricoma Cap Heat Press here: https://shop.ricoma.com/products/hp-0... Learn more about the CHT2 machine series here: https://ricoma.com/US/machine/cht2-se... Get your patch scissors here: https://www.joann.com/gingher-6in-app... Get the heat and bond sheet here: https://www.amazon.com/dp/B01N0FHVKA/... Join our Facebook support group, Embroidery and Custom Apparel Mastery, to connect with decorators just like you: / embroiderymastery Follow us on Instagram where we post videos, how-to tutorials and share inspiring work from more than 30,000 followers: / ricomahq Follow us on TikTok and enjoy embroidery, printing, custom DIYs and more: / ricomahq Join the Ricoma newsletter for educational blogs, videos and live webinars: https://info.ricoma.com/newsletter Get our latest Ricoma YouTube videos sent straight to your Facebook Messenger: https://manychat.com/l2/RiCOMA.us Timestamps: 0:50 - The order of patches and caps 2:00 - The CHT2 machines 2:45 - Digitizing 12:28 - The embroidery plan 12:56 - Materials you’ll need 14:05 - Prepping and embroidering the patches and caps 18:45 - Heat pressing the patches to the heat and bond sheet 21:16 – Heat pressing the patches to the caps 23:21 – Finished product revealed 23:51 – Recap 25:16 – Dropping off the order at the fire station In this episode of Embroidery Hub, Willy embroiders a huge order of custom patches and caps. Here’s what you’ll need: Richardson caps Shrink wrap Small scissors Regular scissors Patch scissors Cotton fabric (black and blue) Heat and bond sheet Teflon paper The first step is to expertly digitize the patch to match the 1920's throwback. To do this, you need to upload a photo of the patch into Chroma Luxe to lay stitches over it. Once you’ve done that, multiply it by five so you can embroidery five patches in one hoop. Next, make sure the machine embroiders in order of color and not by the patch. This means it will embroider one section of each patch at a time and not embroider a whole patch and move on to the next one. Now it’s time to digitize the design for the side of the cap. Create a rectangle and make the width 300 mm. This is because the CHT series machines have a 270-degree cap rotation, which allows you to embroider designs on the sides of the cap. Place your two designs onto either end of the rectangle, make sure they are centered and aligned vertically. Now that the digitizing is done, it’s time to embroider the patches. Wrap all your hoops in shrink wrap and cut the cotton fabric to the size of the hoops. Then insert the hoops into the machine and place the fabric on top of each hoop. After that, start up the machine to embroider the outline. Once the outline is done, cut out the excess cotton fabric, put the hoops back into the machine and press Start to finish the rest of the patch embroidery. While the patches are embroidering, you can load the caps onto another machine to embroider the sides. When the machine is finished embroidering the patches, cut them out of the shrink wrap and clean them up. Next, place the patches face down onto the flat heat press, place the Heat n Bond sheet over the patches and a Teflon sheet on top of the heat and bond sheet. Press at 310 degrees Fahrenheit for 10 seconds to fuse the heat and bond to the patches. Then, just peel the sheet from the patches. To attach the patches to the caps, insert a cap in the cap heat press, place a patch on the cap, put a Teflon sheet over the patch and press at 310 degrees Fahrenheit for 15 seconds. And that’s what it takes to embroider 60 patches and caps! Believe it or not, you can do this project too with the right planning and preparation. If you have any other questions about anything embroidery, make sure to comment down below!
Comments