Скачать с ютуб Amigurumi Crochet Pikachu Tutorial with Tips for Beginners в хорошем качестве
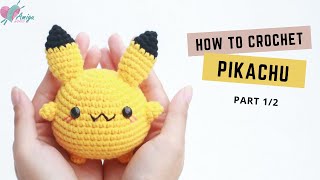
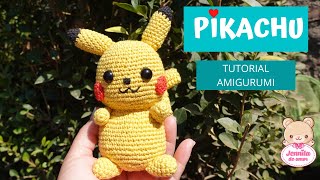
Amigurumi Crochet Pikachu Tutorial with Tips for Beginners
3 года назад
Скачать бесплатно Amigurumi Crochet Pikachu Tutorial with Tips for Beginners в качестве 4к (2к / 1080p)
У нас вы можете посмотреть бесплатно Amigurumi Crochet Pikachu Tutorial with Tips for Beginners или скачать в максимальном доступном качестве, которое было загружено на ютуб. Для скачивания выберите вариант из формы ниже:
Загрузить музыку / рингтон Amigurumi Crochet Pikachu Tutorial with Tips for Beginners в формате MP3:
Если кнопки скачивания не
загрузились
НАЖМИТЕ ЗДЕСЬ или обновите страницу
Если возникают проблемы со скачиванием, пожалуйста напишите в поддержку по адресу внизу
страницы.
Спасибо за использование сервиса savevideohd.ru
Amigurumi Crochet Pikachu Tutorial with Tips for Beginners
Welcome to my first tutorial! My name is Clare AKA 53stitches, and I love all things geekery and crochet. I started my blog as a way to give back to the amazing crochet community who helped me so much when I was first getting started. I get asked a lot about Pikachu's tail - you can skip straight to 12:07 if that's where you're stuck. If you're new to crochet, please check out my blog post 'Amigurumi 101': https://53stitches.com/amigurumi-101/ To get a more detailed breakdown of how to read my patterns, you can find a guide here: https://53stitches.com/reading-patterns/ I explain how to do every stitch once in the tutorial, and then cut through to the next step, so you'll need to refer to the pattern below for full instructions. You will need: 3.0mm crochet hook yellow yarn black yarn brown yarn red felt 2 x 10mm safety eyes fabric glue polyester filling HEAD 1. (in Yellow) MR 6 (6) 2. [ inc ]x 6 (12) 3. [ inc, sc ]x 6 (18) 4. sc, [ inc, sc 2 ]x 5, inc, sc (24) 5. [ inc, sc 3 ]x 6 (30) 6. sc 2, [ inc, sc 4 ]x 5, inc, sc 2 (36) 7-10. sc 36 (36) 11. [ inc, sc 5 ]x 6 (42) 12-13. sc 42 (42) 14. [ dec, sc 5 ]x 6 (36) 15. sc 2, [ dec, sc 4 ]x 5, dec, sc 2 (30) 16. [ dec, sc 3 ]x 6 (24) Finish off, leaving a tail for attaching later. Insert safety eyes between rows 11 and 12, with approximately 7 stitches between them. BODY 1. (in Yellow) MR 6 (6) 2. [ inc ]x 6 (12) 3. [ inc, sc ]x 6 (18) 4. sc, [ inc, sc 2 ]x 5, inc, sc (24) 5. [ inc, sc 3 ]x 6 (30) 6-8. sc 30 (30) 9. [ dec, sc 3 ]x 6 (24) 10-12. sc 24 (24) Finish off. LEGS (MAKE 2) 1. (in Yellow) MR 6 (6) 2. [ inc, sc ]x 3 (9) 3-6. sc 9 (9) Finish off, leaving a tail for attaching later. ARMS (MAKE 2) 1. (in Yellow) MR 6 (6) 2. [ inc, sc 2 ]x 2 (8) 3-4. sc 8 (8) 5. dec, sc 6, (7) Finish off, leaving a tail for attaching later. EARS (MAKE 2) 1. (in Black) MR 5 (5) 2. inc, sc 4 (6) 3. inc, sc 5 (7) 4. inc, sc 6 (8) 5. (in Yellow) inc, sc 7 (9) 6-8. sc 9 (9) 9. dec, sc 7 (8) 10-11. sc 8 (8) Finish off, leaving a tail for attaching later. TAIL 1. (in Yellow) ch 7 (7) 2. turn, sc 12 (6 on either side of chain) (12) 3-4. sc 12 (12) 5. sc 3, skip 6, sc 3 (6) 6. sc 6, ch 4 (10) 7. sc 1, skip 4, sc 5 (6) 8. (in Brown) sc 6 (6) 9. sc 6 (6) Stuff your pieces, pin in place, and assemble. I hope you liked this tutorial, hopefully I can continue to make more of some of my more popular patterns, and if you have any requests, please feel free to comment them below! For more of my patterns, you can shop my Etsy store here: https://www.etsy.com/shop/53stitches/ I also have a variety of free patterns on my blog: https://53stitches.com/category/pattern/ You can follow me on social media to stay up to date with my latest patterns and projects: / 53stitches / 53stitches https://www.ravelry.com/designers/cla... https://www.pinterest.com.au/53stitches/ Thanks so much for tuning in! If you have further questions or want to get in touch, please comment below. Clare x
Comments