Скачать с ютуб 16- Secondary impression of upper arch. Part 2: Border molding the special tray в хорошем качестве
16- Secondary impression of upper arch. Part 2: Border molding the special tray
5 лет назад
Из-за периодической блокировки нашего сайта РКН сервисами, просим воспользоваться резервным адресом:
Загрузить через ClipSave.ruСкачать бесплатно 16- Secondary impression of upper arch. Part 2: Border molding the special tray в качестве 4к (2к / 1080p)
У нас вы можете посмотреть бесплатно 16- Secondary impression of upper arch. Part 2: Border molding the special tray или скачать в максимальном доступном качестве, которое было загружено на ютуб. Для скачивания выберите вариант из формы ниже:
Загрузить музыку / рингтон 16- Secondary impression of upper arch. Part 2: Border molding the special tray в формате MP3:
Если кнопки скачивания не
загрузились
НАЖМИТЕ ЗДЕСЬ или обновите страницу
Если возникают проблемы со скачиванием, пожалуйста напишите в поддержку по адресу внизу
страницы.
Спасибо за использование сервиса savevideohd.ru
16- Secondary impression of upper arch. Part 2: Border molding the special tray
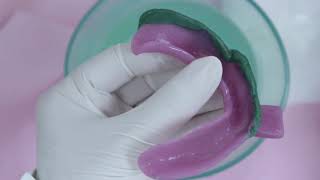
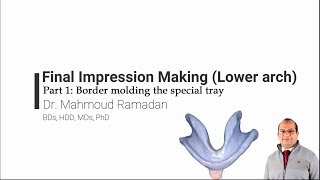
Clinical steps: • Instruments and materials needed for Impression registration. • Wax knife, Scalpel with sharp blade, fire torch, water electric boiler, mixing spatula and wide glass slap. • Green stick compound, medium rubber base, rubber base catalyst and rubber base adhesive. • Border molding (Green compound). Sequence of tracing. • Whatever the school you follow in tracing, you must fill the vestibule in length & width as a final result. • Proper border molding will guarantee the peripheral seal needed to achieve the physical means of retention. • Insert a stick of green compound into the hot water to soften it then adapt it well into the tray borders by hand. • Adapt the compound well to the tray. It will be difficult to be separated during impression making. • In this demo we will make the border molding for the labial and buccal flange in a one step. • Border molding of labial and buccal flange. • Instruct the patient to protrude his lips. • Review border anatomy and check any short areas add new softened compound to achieve the proper extension. • Remove the excess compound in the fitting surface of the tray to avoid pressure areas in the impression. • Molding of posterior palatal seal area. • Adapt the compound to posterior border by hand soften it in hot water before insertion into patient mouth. • Instruct the patient to tilt his head down in forward, right & left directions to register all soft palatal movements. • The ideal suction sound ensures that we have a successful work. • Remove the excess compound from the fitting surface of the tray then scrap the connection between the compound and tray to be flushed. • Using the scalpel blade scrape the borders of compound to reduce it in height for about 1 mm to provide a space for the impression material. • After scrapping of compound the border molded tray is ready for the final impression wash. #step_by_step_complete_denture_making
Comments