Скачать с ютуб How to Make L-Port Plywood Subwoofer Box - DIY в хорошем качестве
How to Make L-Port Plywood Subwoofer Box - DIY
3 года назад
Скачать бесплатно How to Make L-Port Plywood Subwoofer Box - DIY в качестве 4к (2к / 1080p)
У нас вы можете посмотреть бесплатно How to Make L-Port Plywood Subwoofer Box - DIY или скачать в максимальном доступном качестве, которое было загружено на ютуб. Для скачивания выберите вариант из формы ниже:
Загрузить музыку / рингтон How to Make L-Port Plywood Subwoofer Box - DIY в формате MP3:
Если кнопки скачивания не
загрузились
НАЖМИТЕ ЗДЕСЬ или обновите страницу
Если возникают проблемы со скачиванием, пожалуйста напишите в поддержку по адресу внизу
страницы.
Спасибо за использование сервиса savevideohd.ru
How to Make L-Port Plywood Subwoofer Box - DIY
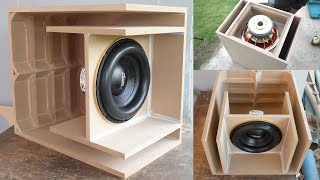
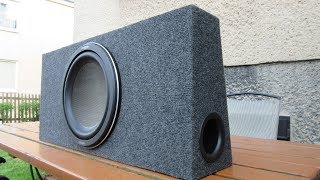
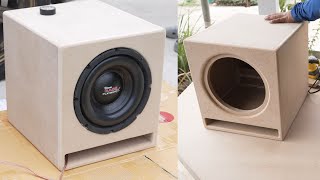
A very simple car subwoofer enclosure made of Marine plywood and with a bit of aged antique style finish. TinkerCad layout and design file - https://www.tinkercad.com/things/aKrL... 00:00 - Unboxing the Massive GTX 122 subwoofer 00:40 - Woodworking begins by cutting the plywood sheet to size using a table saw. 01:10 - Drill pocket holes on the panels using a cheap pocket hole jig. 01:30 - Glue all the panels together. Then screw through the pocket holes for added strength. 02:00 - Cut several corner braces by tilting the table saw blade to 45 degrees. 05:10 - Glue and screw front baffle together with the port walls into the assembly. 05:15 - Then cover the box by gluing the last panel. This will be the underside of the box so all the screws here are not visible. 05:35 - Countersink every screw holes for a seamless and smooth box build. 06:15 - Use a chamfering router bit to roundover all the edges of the box to produce a smooth look and feel of the enclosure. 06:30 - Use the same roundover bit to chamfer the edges of the L-port opening. Doing so will make the air flow smoother and prevents air chuffing. 07:00 - Preview of the box after being sanded and stained with a penetrating wood stain. 07:10 - Time to coat some polyurethane wood varnish! 08:00 - All electrical wiring works and final subwoofer assembly. 08:20 - Wiring the sub voice coils into parallel to achieve 1 Ohm final DC impedance. 08:35 - Jump to this part to watch how to properly drive and install T-nuts and machine bolts. 09:10 - Tighten down all Allen head machine bolts using an impact driver. Be careful not to gouge and tear the rubber seal surround of the speaker. 10:10 - Finally, test and verify the subwoofer enclosure's actual impedance and tuning by using Dayton Audio DATS v3. 10:30 - Actual box tuning is 32.64Hz at 1.285 Ohms impedance. Estimated enclosure bandwidth is 24.22Hz to 52.15Hz And that's a wrap! I hope you all enjoy this new episode of DIY car subwoofer box making. Please let me know what you think of this build by commenting and I hope to see you very soon on the next video. Thank you all very much!
Comments