Скачать с ютуб 2003 - 2008 Toyota Matrix Corolla 1ZZ-FE Timing Chain Tensioner DIY using the Toyota FSM Technique в хорошем качестве
2003 - 2008 Toyota Matrix Corolla 1ZZ-FE Timing Chain Tensioner DIY using the Toyota FSM Technique
1 год назад
Скачать бесплатно 2003 - 2008 Toyota Matrix Corolla 1ZZ-FE Timing Chain Tensioner DIY using the Toyota FSM Technique в качестве 4к (2к / 1080p)
У нас вы можете посмотреть бесплатно 2003 - 2008 Toyota Matrix Corolla 1ZZ-FE Timing Chain Tensioner DIY using the Toyota FSM Technique или скачать в максимальном доступном качестве, которое было загружено на ютуб. Для скачивания выберите вариант из формы ниже:
Загрузить музыку / рингтон 2003 - 2008 Toyota Matrix Corolla 1ZZ-FE Timing Chain Tensioner DIY using the Toyota FSM Technique в формате MP3:
Если кнопки скачивания не
загрузились
НАЖМИТЕ ЗДЕСЬ или обновите страницу
Если возникают проблемы со скачиванием, пожалуйста напишите в поддержку по адресу внизу
страницы.
Спасибо за использование сервиса savevideohd.ru
2003 - 2008 Toyota Matrix Corolla 1ZZ-FE Timing Chain Tensioner DIY using the Toyota FSM Technique
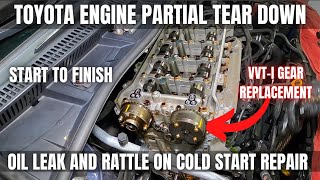
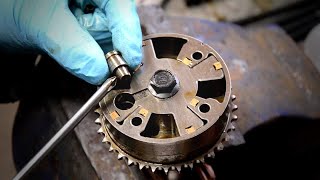
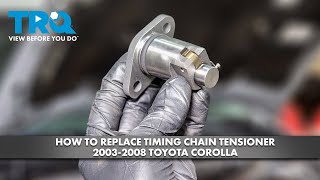
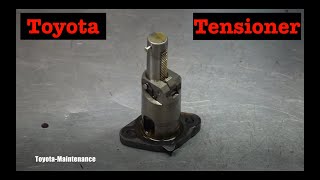
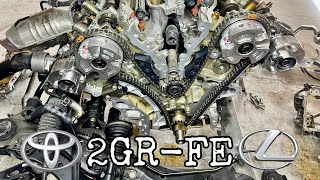
This video shows the Toyota FSM technique for replacing the Timing Chain Tensioner (and O-ring) on late 1ZZ-FE engines ('03 - '08 Corolla and Matrix). This technique is the most conservative and "fool-proof" method for this repair and requires removing the Valve Cover, which is shown in the video. Check the Pinned Comment or below for more info: Timestamps, Part numbers, Torque values: 00:27 Timing Chain Tensioner location and oil leak pattern 01:27 Explanation about the variety of methods for this repair 04:19 Why the Tensioner must be extended properly 05:03 Why some mechanics charge for a Valve Cover job with this repair 05:41 Differences in this video versus some other videos (FSM technique) 09:03 Begin Removal of the Valve Cover, make a bolt template 10:37 Disconnect the electrical connectors for the ignitors 11:48 Remove two fasteners for the electrical harness (10mm) 12:18 Remove four bolts for the ignitors (10mm) 12:39 Remove the ignitors 13:35 Disconnect the breather hose 14:04 Disconnect the hose to the PCV valve 14:44 Locations of the Valve Cover fasteners (ten 10mm, one 12mm) 16:06 Slip the harness off of the three brackets for easier access 17:22 Remove the Valve Cover fasteners 22:17 Tie up the electrical harness for easier access 22:47 Remove the Valve Cover 25:12 Turn the crankshaft clockwise to TDC/Compression (19mm) 27:25 Detailed view of turning clockwise to TDC/Compression 29:02 Detailed view of timing marks 32:04 Demonstration: making another two crank turns to show how the camshaft timing marks align every other crank rotation 34:03 Clean up the old gasket maker/RTV at two spots on the head 36:31 Remove the Timing Chain Tensioner (two 10mm nuts) 39:26 Don't turn the engine with the Chain Tensioner out 40:02 Chain Tensioner on the bench (Toyota 13540-0D010) and O-ring (Toyota 90301-22013 or JIS P22.4) 42:12 Remove the old O-ring (if just replacing the O-ring) 42:46 Experiment: I treat the new O-ring with Dow Molykote 55 O-ring grease 43:25 Install new O-ring to the Chain Tensioner (use a sleeve if possible) 44:54 Retract the Chain Tensioner piston onto the little hook for install 46:36 What's inside the Chain Tensioner? 50:19 Install the Chain Tensioner (80 inch-lbs) 53:29 Review of Toyota FSM procedure for extending the Chain Tensioner piston/plunger 58:38 Slide of the FSM procedure 58:41 Boroscope view of Chain Tensioner 1:00:07 Using the FSM procedure to extend the Chain Tensioner piston/plunger 1:03:41 After extending the Tensioner piston/plunger, verify tension and timing with two clockwise turns 1:07:35 Slide of the FSM Timing Marks note 1:07:47 Note about using a screwdriver to release the piston/plunger 1:08:10 Remove the old Valve Cover gasket (Toyota 11213-0D040, or Fel-Pro VS 50542 R) 1:09:18 Install the new Valve Cover gasket 1:11:00 Clean the Valve Cover gasket mating surface 1:11:20 Apply FIPG/gasket-maker/RTV onto two places on the head (I use Permatex Ultra Black RTV) 1:13:30 Install the fasteners for the Valve Cover (Perimeter bolts/nuts: 96 inch-lbs; Center bolts: 80 inch-lbs) 1:17:04 Reconnect the electrical harness to the brackets 1:17:50 Re-install the ignitors and bolts (80 inch-lbs) 1:18:13 Re-install the electrical harness fasteners (80 inch-lbs) 1:18:40 Reconnect the electrical for the ignitors 1:19:06 Reconnect the two breather hoses 1:20:14 Allow the RTV to cure then start the engine 1:20:54 Clean up the oil leak (if applicable) This is the experimental JIS P22.4 75 Durometer FKM O-ring I used in the video: https://www.oringsandmore.com/fkm-o-r... minimum-3-pcs/ This is the experimental O-ring grease (Molykote 55): https://www.amazon.com/Corning-Molyko... Lubricant/dp/B01HEC1W3A/ref=sr_1_6 I hope this video was helpful for you. Thank you for watching, and good luck with your repair! 👍
Comments