Скачать с ютуб 2000 Silverado AC Condenser & Radiator, Receiver Dryer, and Orifice Tube в хорошем качестве
2000 Silverado AC Condenser & Radiator, Receiver Dryer, and Orifice Tube
7 лет назад
Скачать бесплатно 2000 Silverado AC Condenser & Radiator, Receiver Dryer, and Orifice Tube в качестве 4к (2к / 1080p)
У нас вы можете посмотреть бесплатно 2000 Silverado AC Condenser & Radiator, Receiver Dryer, and Orifice Tube или скачать в максимальном доступном качестве, которое было загружено на ютуб. Для скачивания выберите вариант из формы ниже:
Загрузить музыку / рингтон 2000 Silverado AC Condenser & Radiator, Receiver Dryer, and Orifice Tube в формате MP3:
Если кнопки скачивания не
загрузились
НАЖМИТЕ ЗДЕСЬ или обновите страницу
Если возникают проблемы со скачиванием, пожалуйста напишите в поддержку по адресу внизу
страницы.
Спасибо за использование сервиса savevideohd.ru
2000 Silverado AC Condenser & Radiator, Receiver Dryer, and Orifice Tube
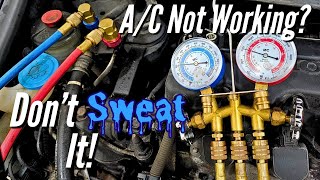
Parts Available At Amazon.com AC Condenser (Models Without Rear AC) http://amzn.to/2q42aRe AC Receiver/Dryer (Accumulator) http://amzn.to/2q4CLGV AC Orifice Tube http://amzn.to/2qFNVFd AC High-Pressure Switch (Inline on High-SIde; Not Compressor Mounted) http://amzn.to/2q4h1e7 AC High-Pressure Cut-Off Switch (Mounted On Back Of Compressor) http://amzn.to/2q4tPRV AC Low-Pressure Switch http://amzn.to/2rDw67F AC Compressor Replacement Video: • 2000 Chevy Silverado AC Compressor This vehicle had enough debris between the ac condenser and radiator that is prevented the airflow needed to remove the heat from both the condenser and radiator. This actually causes both systems to run hotter and under more stress than normal. We can tell by measuring the system pressures that the AC condenser had a problem, either a clog internal or external, We proceeded to inspect the condenser by removing it as this vehicle has zero clearance for visual inspection without removal. Once removed we found the debris, We cleaned the debris out of the radiator and gave the customer the option to clean or replace the condenser since the condenser was already removed and since It is 17 years old, they decided to replace it. This fixed the heat exchange problem and the system ran much better and was able to take a full charge of refrigerant. The vehicle ran for a while and got nice and cold and we watched it go through several cycles, this is when the compressor shut off again as the high pressure blow out or cut-out switch had an intermittent electrical failure internally which we verified by checking voltage and outputs demanded by the control head. This compressor unfortunately requires removal to replace that blow out switch. Since the vehicle has 190,000 miles and is 17 years old, we gave the option of switch only or compressor with a new switch, The customer decided and We installed a brand new ACDelco compressor with a new switch and all problems were solved. 00:00 - Intro 00:50 - Connect and Check AC Gauges 04:09 - Remove Front Cover 04:40 - Remove Condenser Mounting Bolts 05:58 - Disconnect AC Lines to Condenser 06:37 - Remove Grill 07:45 - Remove Headlights 09:21 - Loosen Front Bar and Remove Condenser 11:46 - Compare Old & New Part 12:15 - Install New Condenser 12:55 - Bolt up AC Lines, Mounts, and Front Bar 15:21 - Install Headlights 15:42 - Install Grill 16:01 - Install Front Cover 16:25 - Remove Accumulator 17:19 - Disconnect Accumulator Line 19:06 - Remove Orifice Tube 20:01 - Compare Old & New Part 20:40 - Install New Orifice Tube 21:03 - Compare Old & New Accumulator 23:03 - Install New Accumulator 24:09 - Vacuum & Refill AC system 30:34 - Low-Pressure Switch Issue
Comments