Скачать с ютуб How to Operate AMI Mini Hand Sewing Machine в хорошем качестве
How to Operate AMI Mini Hand Sewing Machine
8 лет назад
Из-за периодической блокировки нашего сайта РКН сервисами, просим воспользоваться резервным адресом:
Загрузить через ClipSave.ruСкачать бесплатно How to Operate AMI Mini Hand Sewing Machine в качестве 4к (2к / 1080p)
У нас вы можете посмотреть бесплатно How to Operate AMI Mini Hand Sewing Machine или скачать в максимальном доступном качестве, которое было загружено на ютуб. Для скачивания выберите вариант из формы ниже:
Загрузить музыку / рингтон How to Operate AMI Mini Hand Sewing Machine в формате MP3:
Если кнопки скачивания не
загрузились
НАЖМИТЕ ЗДЕСЬ или обновите страницу
Если возникают проблемы со скачиванием, пожалуйста напишите в поддержку по адресу внизу
страницы.
Спасибо за использование сервиса savevideohd.ru
How to Operate AMI Mini Hand Sewing Machine
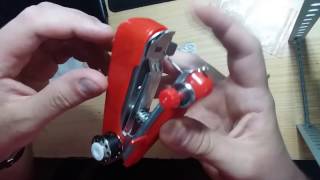
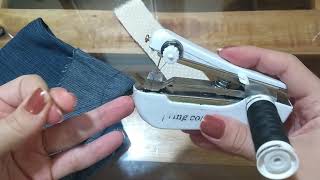
AMI Portable Mini Hand Sewing Machine Stapler isquick and easy to use . Professional Tailors Often Refuse To Fix Hems OfClothes and Stitching them With Hands Is a Cumbersome Task. This MiniStapler Style Sewing Machine From AMI Helps You Hem Your Clothes With EaseAnd Is Ideal For Small, Emergency Repairs. Stitching Clothes With ThisMachine Is As Easy As Using A Stapler. Put The Cloth Under The FasteningPlate And Secure It In Place. Press The Machine Like A Stapler. A SinglePress Will Yield One Stitch. Continue The Process Until The Damaged PortionOf The Cloth Is Hemmed. 1.Proper Way To Hold Ami Mini Hand Sewing Machine Hold the machine with your right hand , placing the thumb on top of the machine , with the fingers supporting the bottom . 2. Threading The Machine Use a bobbin or spool. Pull the thread through thread guide ring (1) Then lead the thread between two Tension Adjusting Discs (2) and through second thread guide (3)Next, pull the thread further and guide it through the eyelet of the needle from the right hand side to the left until the thread end is about one inch from the eyelet .When using a threader, guide the threader loop through the eyelet from left to right ,lead the thread through the threader loop ,and pull the threader to the left . 3. Positioning the cloths Raise the cloth fastening plate with your right hand forefinger and place the cloth under the fastening plate . 4.Adjusting thread tension The cloth self feeding system adopted on this Hand Sewing Machine feeds the cloth and stitches in proper tension automatically. However ,a few helpful hints . If stitching is too tight , turn Tention Nut slightly to left . If stitching is too loose turn tention Nut slightly to right 5.Sewing operation Hold the left end of cloth with your left hand and press the needle into the cloth all the way by gripping the Machine gently as you move the machine to the right while pulling the cloth slightly to the left . Repeat this action constantly to achieve smooth sewing operation when wider stitches are required . Pull cloth to the left a little faster while you continue stitches . Follow the red guide line on cloth fastening plate to ensure straight stitching. 6.How to set a spool on the machine Remove the small sized bobbin from the Machine (leave the left washer in original position ) connect the Auxiliary Axis to the bobbin shaft and place a plastic cap on the end of the Axis to secure the spool. When a larger spool is adopted recheck thread tention and adjust tension if necessary.Use cotton thread 50-60 or polyester spun thread for best results. 7. To Finish stitching Pull out the thread end about 2 inches under the cloths toward the right and cut the thread with scissors. After pushing down the needle and raising it up lift up the cloth fastening plate with your right hand forefinger and pull out the cloth to the left .To keep both needle and cloth from being damaged confirm that the needle is not in the cloth. Stitches made by this machine can be removed easily when the thread appearing on the right side of the cloth is pulled out ways to ensure fast stitching are illustrated below use of a threader or a cloth picker is recommended for easier operation.Tie the excessive thread on the back side of the cloth to ensure a tight finish pull out the thread end to the back side of the cloth and guide it through the loop of the last stitch, then tie it. This completes the stitch permanently. 8. Replace Needle 1. Loosen the setscrew and pull out the old needle.2. Insert a new needle as far as it will go with the flat face of the needle facing the setscrew.3. Tighten the set screw firmly (use a small screwdriver to ensure tighter grip ). Always use DH 1*1 14 Needle
Comments