Скачать с ютуб Installing Renogy DC to DC charger with MPPT in Sprinter Van | Van Build Series Ep. 42 в хорошем качестве
Installing Renogy DC to DC charger with MPPT in Sprinter Van | Van Build Series Ep. 42
1 год назад
Скачать бесплатно Installing Renogy DC to DC charger with MPPT in Sprinter Van | Van Build Series Ep. 42 в качестве 4к (2к / 1080p)
У нас вы можете посмотреть бесплатно Installing Renogy DC to DC charger with MPPT in Sprinter Van | Van Build Series Ep. 42 или скачать в максимальном доступном качестве, которое было загружено на ютуб. Для скачивания выберите вариант из формы ниже:
Загрузить музыку / рингтон Installing Renogy DC to DC charger with MPPT in Sprinter Van | Van Build Series Ep. 42 в формате MP3:
Если кнопки скачивания не
загрузились
НАЖМИТЕ ЗДЕСЬ или обновите страницу
Если возникают проблемы со скачиванием, пожалуйста напишите в поддержку по адресу внизу
страницы.
Спасибо за использование сервиса savevideohd.ru
Installing Renogy DC to DC charger with MPPT in Sprinter Van | Van Build Series Ep. 42
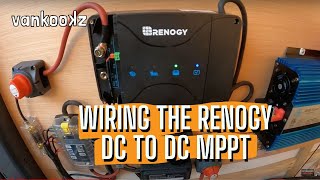
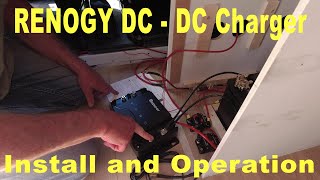
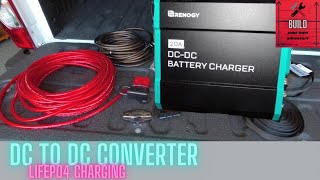
Today I'm going to walk you through some Sprinter-specific installation things around installing this great dual-purpose DC-DC charger and MPPT Solar Charge controller. It's both a solar charge controller and a DC-DC charger, and it's small, so if you have a tight, well, extra tight space in which to do your installation, you may want to consider this product. By using this product, you'll have two ways to charge your battery array. 1. Solar panels and 2. Vans alternator. STEPS FOR THE INSTALLATION OF THE 50A RENOGY DC-DC charger and MPPT:- 1. Top right spot: Black/Negative (2 gauge wire) to the Black bus bar 2. Bottom right spot: Red/Positive (2 gauge wire) to 60amp (says 65amp above) fuse and then positive bus bar 3. Bottom left spot: Red/Positive (4 gauge wire) to 60amp (says 75amp above) fuse and then to the vans starter battery/alternator (under the driver's seat) • Renogy DC to DC Battery Charger Install 4. Top left spot: Red/Positive solar 10 gauge - wire to ON/OFF shutoff and then up to the roof to the solar panels. (NOTE: allows you to reset the charger if you ever need to) NOTE: the Black/negative 10 gauge wire from the solar panel goes directly into my black bus bar. 5. IGN - Little green thing for "smart alternator" 6. RS485 port run to the BT-2 battery monitor (NOTE: allows you to enter custom parameter mode; will need this to tweak the parameters for the Battle Born batteries) 7. It will automatically go to "float charge mode" because I have Lithium Ion batteries. ==NOTE: Don't install the battery temp sensor for Lithium Ion batteries as they regulate themselves.== Enjoy and make sure to subscribe to follow along with my van build! -------------Website------------- https://www.vanlifedesigner.com -------------Instagram------------- / vanlifedesigner -------------YouTube------------- Subscribe: https://www.youtube.com/c/VanLifeDesi... #vanbuild #vanlife #vanlifesolofemale
Comments