Скачать с ютуб How To Remove The Legshield Trim - Vespa GT/GTS/GTV в хорошем качестве
How To Remove The Legshield Trim - Vespa GT/GTS/GTV
3 года назад
Скачать бесплатно How To Remove The Legshield Trim - Vespa GT/GTS/GTV в качестве 4к (2к / 1080p)
У нас вы можете посмотреть бесплатно How To Remove The Legshield Trim - Vespa GT/GTS/GTV или скачать в максимальном доступном качестве, которое было загружено на ютуб. Для скачивания выберите вариант из формы ниже:
Загрузить музыку / рингтон How To Remove The Legshield Trim - Vespa GT/GTS/GTV в формате MP3:
Если кнопки скачивания не
загрузились
НАЖМИТЕ ЗДЕСЬ или обновите страницу
Если возникают проблемы со скачиванием, пожалуйста напишите в поддержку по адресу внизу
страницы.
Спасибо за использование сервиса savevideohd.ru
How To Remove The Legshield Trim - Vespa GT/GTS/GTV
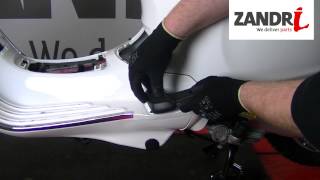
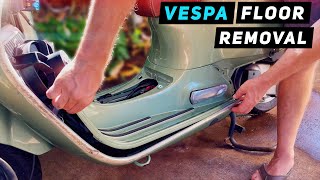
The usually unobtrusive legshield beading can negatively affect the look of your scooter when it is damaged. In order to fix them, the glovebox and floor board must be removed. In this video I show how to remove The Legshield Trim of a Vespa GT/GTS/GTV step by step, at home, with basic tools and without spending any money! I would go over on how to remove the glove box compartment, side panels, floor and Footrest to get access to the Legshield Trim. With that, here’s what I’m going to cover in this video. #1: 00:07 First, I start off removing the glovebox. #2: 01:31 Then, I show you how to correctly disconnect the cable behind the glovebox. #3 02:21 then you need to remove the Battery cover to get access to a single fastener. #4: 02:32 after removing the glovebox, I show you how to remove the Footrest from the frame. #5: 02:46 Then, I show you how to remove the side panels #6: 03:19 Then, I show you how to carefully remove the rubber from the floor to get access to three screws to be able to remove the floor from the scooter. #7: 04:31 remove the floor from the scooter after following the previous steps. BUD-TIP: After disassembling the glovebox, the footrest and the floor I am going to take advantage and replace the ugly plastic bag hook with a nice hight quality hook with the Vespa logo. You can get yours at thescooterbud.com links are down below. ( • How To Install The Aluminum Bag Hook ... ) #8: 04:53 removing the Legshield Trim #9: 05:09 With both Legshield Trim already install, To refit the floor and the glovebox, carry out the removal operations but in reverse order. Just be careful and go gradually when pressing down the trim into the frame. Recommenced Videos: How to Clean a CV (Constant Velocity) Carburetor - Vespa ET4 150CC WALBRO WVF6 • How to Clean a CV (Constant Velocity)... How to Paint The Calipers of a Vespa GTV or Any Other Scooter • How to Paint The Calipers of a Vespa ... How To Remove The Wheels Of a Vespa GT/GTS/GTV (Short Version) • How To Remove The Wheels Of a Vespa G... [LINK TO PRODUCTS USED/MENTIONED]: Black Foot Rests For Vespa GTV https://www.thescooterbud.com/product... Black Wheel Rims for Vespa GTS https://www.thescooterbud.com/product... Pair Black Front Rear Wheel Rims Frame For Vespa Primavera https://www.thescooterbud.com/product... New to The Scooter Bud? If so, here's what you need to know -- I like to Restore & Customize Scooters a LOT, so I use this channel to explore, learn and show you everything in detailed to help you create the most unique scooter! Join our growing community for new videos every week! SUBSCRIBE & Don’t forget to turn on your notifications! / @thescooterbud Where else you can find me: WEBSITE: http://thescooterbud.com INSTAGRAM: / thescooterbud FACEBOOK: / thescooterbud ⚠️ DISCLAIMER: Some of the links provided in this videos might be affiliate links. If a purchase is made using that specific URL, I may receive a small commission. There is no additional charge to the order! Thank you for supporting my channel so I can continue to produce free content each week!
Comments