Скачать с ютуб How To Install Dual Z Axis Lead Screw On Creality Ender 3 Max (Using A Regular Ender 3 Kit!) в хорошем качестве
How To Install Dual Z Axis Lead Screw On Creality Ender 3 Max (Using A Regular Ender 3 Kit!)
1 год назад
Скачать бесплатно How To Install Dual Z Axis Lead Screw On Creality Ender 3 Max (Using A Regular Ender 3 Kit!) в качестве 4к (2к / 1080p)
У нас вы можете посмотреть бесплатно How To Install Dual Z Axis Lead Screw On Creality Ender 3 Max (Using A Regular Ender 3 Kit!) или скачать в максимальном доступном качестве, которое было загружено на ютуб. Для скачивания выберите вариант из формы ниже:
Загрузить музыку / рингтон How To Install Dual Z Axis Lead Screw On Creality Ender 3 Max (Using A Regular Ender 3 Kit!) в формате MP3:
Если кнопки скачивания не
загрузились
НАЖМИТЕ ЗДЕСЬ или обновите страницу
Если возникают проблемы со скачиванием, пожалуйста напишите в поддержку по адресу внизу
страницы.
Спасибо за использование сервиса savevideohd.ru
How To Install Dual Z Axis Lead Screw On Creality Ender 3 Max (Using A Regular Ender 3 Kit!)
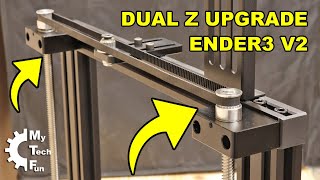
In this video I will show you how to perform the dual z lead screw upgrade on the Creality Ender 3 Max printer using a regular Ender 3 dual z lead screw kit! I am using an official Creality kit that was originally intended for the Ender 3 V2. The dual z lead screw kits specifically for the Ender 3 Max can sometimes be more difficult to source. Firstly, why would you want to perform this upgrade? Well, the Ender 3 Max has a long gantry span and the unsupported end of the gantry can sometimes sag on certain printers that came from the factory with loose tolerances. I've used many Ender 3 Max printers and the odd one has had this problem and I see it reported from other users online as well. By adding the second lead screw, the free end of the gantry is now supported and will not sag. You will now have consistent first layer performance! As always, I pay attention to the fine details of the installation. Be sure to watch thoroughly so you don't miss those important little steps that other videos often skip over! The great thing is that to make this upgrade work on the Ender 3 Max, you only need to replace one part in the whole kit... the lead screw. The regular kit comes with a shorter lead screw and you need a 500mm long lead screw. You need to look for a lead screw with an 8mm diameter, 4 starts, 2mm pitch and 8mm lead such as the following: ► https://amzn.to/3BE69tD Here is the kit that I used: ► https://amzn.to/3f57pyc While you're shopping, check out my favorite filament: ► https://amzn.to/3BGv8MT Don't own an Ender 3 Max yet? Check out this deal: ► https://amzn.to/3DQHyoe Looking for Ender 3 Max Upgrades you won't find anywhere else? Then check out my offerings: ► https://embracemaking.com/collections... As an Amazon Associate may I earn from qualifying purchases (at no extra cost to you). Don't forget to lubricate your lead screws at the end, re-level your print bed, and pay attention to all of the fine details in this video! If you have any questions, comments, or suggestions, I would love to hear from you in the comments section below. Thank you for watching! #creality #ender3 #3dprinting 0:00 Intro 1:10 Unboxing 1:40 Remove Power Supply 2:05 Install Stepper Motor 3:48 Remove V Wheels 5:23 The Secret Sauce 5:43 Install New Gantry Plate 6:46 Adjust Lead Screw Nut 8:31 Wiring 12:20 Power Supply Bracket 13:34 Lead Screw Bearing Supports 14:50 First Layer Nirvana 15:37 30 Hour Print 16:12 Outro #creality #ender3 #3dprinting **************************************************************** If you enjoy and have benefited from my content and are feeling generous I would love your support! You can "buy me a coffee" here: ► https://www.paypal.com/donate/?hosted... ☕ By supporting my channel you are encouraging me to continue with this time consuming endeavor. A lot of time goes into design work, building my projects, filming the videos, editing the videos, etc. Plus it all costs money! Your generosity goes a long way in helping me bring you better content as often as I can! Follow me on Instagram! ► / embracemaking 📷 If you liked this video, perhaps you will also enjoy some channels that I personally find inspiring and interesting... ► The Hacksmith / @hacksmith ► Adam Savage Tested / @tested ► Thomas Sanladerer / thomassanladerer
Comments