Скачать с ютуб BMW F2x F3x Springs and Shocks Installation (RWD & xDrive) в хорошем качестве
BMW F2x F3x Springs and Shocks Installation (RWD & xDrive)
4 года назад
Скачать бесплатно BMW F2x F3x Springs and Shocks Installation (RWD & xDrive) в качестве 4к (2к / 1080p)
У нас вы можете посмотреть бесплатно BMW F2x F3x Springs and Shocks Installation (RWD & xDrive) или скачать в максимальном доступном качестве, которое было загружено на ютуб. Для скачивания выберите вариант из формы ниже:
Загрузить музыку / рингтон BMW F2x F3x Springs and Shocks Installation (RWD & xDrive) в формате MP3:
Если кнопки скачивания не
загрузились
НАЖМИТЕ ЗДЕСЬ или обновите страницу
Если возникают проблемы со скачиванием, пожалуйста напишите в поддержку по адресу внизу
страницы.
Спасибо за использование сервиса savevideohd.ru
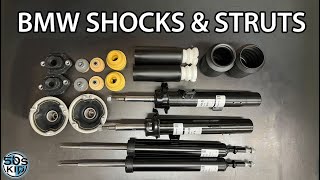
BMW F2x F3x Springs and Shocks Installation (RWD & xDrive)
This guide will show you how to swap the springs and dampers on RWD and xDrive F2x and F3x vehicles. I have my own preferred method for xDrive vehicles that differs a bit from BMW's offical method, but is much easier. Additionally the method for the front struts varies a bit from xDrive, but the rear method is the same between them. ***For those using the "BMW xDrive method" (which sucks IMO) I forgot to include reinstalling the front drive axle back into the knuckle, which would occur at time 15:59. Make sure the teeth of the axle are engaged to the hub properly (turn the axle by hand to feel the teeth slotting in), and then install the collar bolt. You won't be able to torque the collar bolt fully unless stepping on the brake, so just wait till the wheel is on and the car is lowered to torque it to 210 Nm / 155 ft-lbs. Index: 0:00 Intro 0:14 Removing covers in the engine bay 1:30 Loosening/removing top mount hardware 3:43 BMW xDrive method Removing the front axle collar bolt 5:07 Raising the car 5:13 Disconnecting front wheel well components 8:39 Dropping the front knuckle 9:01 Removing the strut assembly 10:46 Front strut assembly disassembly 12:22 Front strut assembly reassembly 15:06 Installing the front strut assembly into the car 16:59 Reinstalling front wheel well components 19:43 Disconnecting rear wheel well components 20:36 Disconnecting rear camber arm hardware 21:59 Rear damper removal 22:15 Rear spring removal, and new spring installation 22:52 Rear damper assembly disassembly 24:23 Rear damper assembly reassembly 26:06 Installing the rear damper assembly into the car 26:29 Rear camber arm to wheel carrier assembly 27:31 Rear camber arm hardware torquing 28:11 Rear wheel well components installation 28:34 Wheels installation 28:51 Torquing top mount hardware 29:51 Installing engine bay covers 30:33 Closing remarks *Affiliated Links -Pass-through Socket Set: https://amzn.to/3aqp901 -18mm Strut Nut Socket: https://amzn.to/3dotjah or Strut Nut Socket Set: https://amzn.to/2J77AWH -Strut Knuckle Spreader Tool: https://amzn.to/3bixH99 -17mm Hex Socket (for Collar Bolt): https://amzn.to/39fHnjl -Long Torx Socket Set: https://amzn.to/33KPHX1 -Crow's Foot Wrench Set: https://amzn.to/2wnFgN6 ____________________________________________________ DISCLOSURE: Some of the product links on this page are Amazon affiliated so I earn a commission at no extra cost to you. Thanks for your support!
Comments