Скачать с ютуб Installation + Footage - Reolink’s AMAZING 12MP Security Camera Review в хорошем качестве
Installation + Footage - Reolink’s AMAZING 12MP Security Camera Review
2 года назад
Скачать бесплатно Installation + Footage - Reolink’s AMAZING 12MP Security Camera Review в качестве 4к (2к / 1080p)
У нас вы можете посмотреть бесплатно Installation + Footage - Reolink’s AMAZING 12MP Security Camera Review или скачать в максимальном доступном качестве, которое было загружено на ютуб. Для скачивания выберите вариант из формы ниже:
Загрузить музыку / рингтон Installation + Footage - Reolink’s AMAZING 12MP Security Camera Review в формате MP3:
Если кнопки скачивания не
загрузились
НАЖМИТЕ ЗДЕСЬ или обновите страницу
Если возникают проблемы со скачиванием, пожалуйста напишите в поддержку по адресу внизу
страницы.
Спасибо за использование сервиса savevideohd.ru
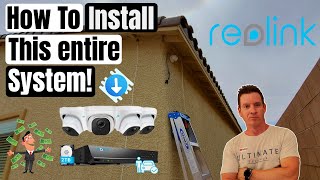
Installation + Footage - Reolink’s AMAZING 12MP Security Camera Review
😁😁😁Check Deals at Reolink.com😁😁😁 👍 This 12MP Camera's replacement: Reolink RLC-820A: https://reolink.com/us/product/rlc-82... 👍 Reolink 8 Channel NVR (N7MB01): https://reolink.com/us/product/rln8-4... ⚡⚡⚡⚡Amazon Product Links:⚡⚡⚡⚡ 👍 NVR + 4 4K cameras - RLK8-800D4: https://amzn.to/3viOc4q 👍 Reolink RLC-1220A Camera is discontinued and replaced with RLC-820A: https://amzn.to/3vfJQuC 👍 Patch Panel: https://amzn.to/3TReN2N 👍 CAT6 Direct Burial Cable: https://amzn.to/3gOAmdb 👍 Similar Junction Box: https://amzn.to/3eQ4xSC 💻💻💻💻 Blue Iris 💻💻💻💻 😀😀😀Download, Demo and Buy Blue Iris: http://www.hometechdiy.com/buy-blue-i... 👍 My Blog post: http://www.hometechdiy.com/reolink_12... 00:00 Intro 00:46 Unboxing & Specs 05:14 Connection Option 1 - NVR 06:57 Connection Option 2 - Home Network 10:08 Install Location 1 - Field 11:57 Install Location 2 - Deck 14:33 Install Location 3 - Driveway 17:12 Water Test 17:35 Bandwidth & Storage 18:30 Conclusion Hey Guys, Today we are checking out the 12mp turret style security camera from Reolink. It’s model number RLC-1220A. That’s a lot of MP for less than $100US. We’ll do a quick rundown of what’s in the box & the specs of this high megapixel device. We’ll also look at a few of the connectivity options. And of course, we’ll dive into some daytime & nighttime footage from various install locations. Lastly, we’ll do a water test on the camera and talk about bandwidth & storage. Included in the box: Certifications, drill template, user manual, window stickers, network cable, weather sealing grommet, screws and anchors, and camera. There are 3 leads attached to the camera; an RJ-45 network connection to plug the camera into your Network Video Recorder (NVR) or your home network. The next cable is a 12v DC connection. This camera does not come with a power adapter, but one could be used if you are unable to take advantage of the PoE port to power the device. The last cable is a reset button. To use it, press and hold for 10s while powering up the camera. On the back of there camera is there a water tight door where you can install a micro SD card up to 256gigs. This will record motion only and not continuous footage. It can hold up to 72 hours of motion. Just below the camera’s lens is the environment lighting sensor. There is a small a hole just below the light sensor which is the camera’s microphone. There is no speaker on this camera. Looking at the camera lens, it’s a 5mm fixed lens with a horizontal field of view of 67 degrees and a vertical view of 41 degrees. The 12mp CMOS sensor is 1/2.49 inches in size and can stream video up to 20fps at over 8000Kbps (kilobit). Surrounding the lens, we have the LED night vision lights. They are rated for 30m or 100ft. We’ll test that in a bit. The camera’s operating temp only goes down to -10 degrees C or 14F. At this point I have tested the camera well below this temperature without issues. When plugging in a new Reolink camera into a Reolink NVR, the NVR picks up the device and adds it to its collection. The new camera is then available on all user interfaces without any action by you. This includes the NVR’s UI itself, the web user interface, the Reolink PC app and the Reolink mobile device app. The 2nd option is the standalone method. All you need is the camera and a way to power the device. When accessing the camera using the mobile device app, it will automatically show up as a camera to be initialized. You can also access the camera over its web user interface, the PC app or a third-party camera management software like Blue Iris. The first install location will be looking onto a large 300ft empty field. We review the daytime and night footage. We then set the camera up to look at the stars and I happen to capture the northern lights. The 2nd install location is look onto my back deck. Again, we look at daytime and nighttime footage and also try out the camera’s mic with an audio test. Since my back deck lights turn on when it’s dark out, they provide sufficient lighting for the camera to work in color mode. We will also look at the stars and get a beautiful surprise from Lady Aurora. The last install location is looking onto the driveway. We use a license plate to test the distance at day and night. As a final test, we use a garden hose and spray the camera to ensure it will survive a large rain storm. The camera performed great and there were no issues with the excessive amount of water. In the last section we discuss the camera’s network and HD usage to see how much data is being streamed. We also figure out how long it will take to fill a 1TB hard drive. Thanks for watching!
Comments