Скачать с ютуб How to install TOTO Neorest RH MS988CUMFG (Full Installation Process) в хорошем качестве
How to install TOTO Neorest RH MS988CUMFG (Full Installation Process)
3 года назад
Скачать бесплатно How to install TOTO Neorest RH MS988CUMFG (Full Installation Process) в качестве 4к (2к / 1080p)
У нас вы можете посмотреть бесплатно How to install TOTO Neorest RH MS988CUMFG (Full Installation Process) или скачать в максимальном доступном качестве, которое было загружено на ютуб. Для скачивания выберите вариант из формы ниже:
Загрузить музыку / рингтон How to install TOTO Neorest RH MS988CUMFG (Full Installation Process) в формате MP3:
Если кнопки скачивания не
загрузились
НАЖМИТЕ ЗДЕСЬ или обновите страницу
Если возникают проблемы со скачиванием, пожалуйста напишите в поддержку по адресу внизу
страницы.
Спасибо за использование сервиса savevideohd.ru
How to install TOTO Neorest RH MS988CUMFG (Full Installation Process)
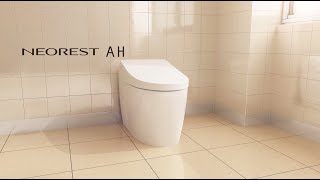
How do I install a TOTO Neorest RH Bidet and toilet? We hear this question frequently and have put together an in-depth installation of the TOTO Neorest RH MS988CUMFG video to address these concerns. This video goes over both the installation of the TOTO Neorest RH Bowl (SKU CT989CUMFG) and the installation of the TOTO Neorest RH top (SKU SN988M) in detail. It's important to note that if you're looking to install the TOTO Neorest AH (SKU MS989CUMFG), it uses the same bowl as the Neorest RH, so only the top portion would be different. In this video we talk about positioning for the water inlet and electrical, mounting the neorest bowl, common mistakes that are made, and much, much more! Purchase the TOTO Neorest RH: https://www.manybidets.com/product/to... Other Many Bidets TOTO Neorest RH resources: https://www.manybidets.com/blog/?sort... Neorest RH Playlist: • TOTO Neorest RH Confused and need help picking a bidet? Get our ebook! https://www.manybidets.com/how-to-pic... Don't forget to Subscribe for the latest reviews, compares, install tips, troubleshooting, and giveaways: https://goo.gl/gpJu2d Visit our site: https://www.manybidets.com Need help deciding? Check out our quiz: https://www.manybidets.com/blog/bidet... We hope this will help! Don't forget to Subscribe for the latest reviews, compares, and giveaways: https://goo.gl/gpJu2d Useful Links & Info: Phone: (Call or Text): 248-974-4030 Email: [email protected] In-depth compares: https://www.manybidets.com/blog/?sort... Testimonials: http://www.manybidets.com/reviews-and... Learn about us: https://www.manybidets.com/about/?utm... If you don't do this properly, you will completely ruin your new Neorest and you'll have to get a replacement. Hello everyone my name is Daniel Johnson, i'm the owner of many bidets.com. Today we are going to talk about installing the Toto Neorest RH. Here you can see the unit completely installed, we're going to start from absolutely ground one, all the way through to completely installed like you see here. The tools that you'll need is a number three Phillips, a number two Phillips, a drill with an assortment of drill bits, a level and a crescent wrench. Everything else that you need comes with, except for the wax ring and the flange hardware; which comes with your original flange, which should already be installed in the floor well before the toilet is put in. Other than that, everything comes with. We'll walk through the entire process and show you how easy it is to install a Toto Neorest RH. Here is the hardware that comes with the Toto Neorest RH, that's needed for the bowl installation portion. We install the bowl and then we install the seat. There are a few items here that are not included. These items on the far side, come with your flange that you purchased from the hardware store when you installed the drain hole, so you'll need those. Your wax ring or in our scenario we're going to use a better than wax ring. Simply because this is a demo installation and we want there to be no mess on the flange when we install our next toilet. Most of the time you do something like the wax ring, a standard wax ring. We also need the flange adapter which comes with, which is going to install and the bowl is going to connect to it. If you are using a plastic flange, you're going to put the wax ring down on the flange. If you're using a metal flange you're, going to put the wax ring up on the flange adapter when you're tightening it. The only other thing that does not come with, is the plumber's tape. So you'll want to make sure that you have some of that for connecting everything up. Now in order to make sure that your Toto Neorest RH is going to fit, you'll need to measure from the center of the flange hole, to the back of the wall. We need at least 12 inches, and that's what you would call a 12 inch rough-in. Here you can see we have about 11 and a half. But, we have a trim that's about three quarters (¾) of an inch So if we don't take the trim into account, we have our 12 inches plus a little bit. The rough-in is to the back wall, not to the trim. The other important thing is to make sure that your water inlet is located properly... 00:00 Introduction 00:34 What is included 02:30 Fitment of the Toto Neorest RH 03:27 Bowl Install 06:58 Mounting Template 11:46 Overview of Seal and Manual Flush 12:45 Installing the toilet 14:33 Installing the bowl 16:04 Installing the seat 20:00 Attaching the back of the seat 20:20 Connecting the water lines 21:58 Manual flush 25:26 Finishing the install 26:31 Installing the remote 29:42 Closing
Comments