Скачать с ютуб [LIVE WR] ESWC F-4 - 13.15 в хорошем качестве
[LIVE WR] ESWC F-4 - 13.15
1 год назад
Скачать бесплатно [LIVE WR] ESWC F-4 - 13.15 в качестве 4к (2к / 1080p)
У нас вы можете посмотреть бесплатно [LIVE WR] ESWC F-4 - 13.15 или скачать в максимальном доступном качестве, которое было загружено на ютуб. Для скачивания выберите вариант из формы ниже:
Загрузить музыку / рингтон [LIVE WR] ESWC F-4 - 13.15 в формате MP3:
Если кнопки скачивания не
загрузились
НАЖМИТЕ ЗДЕСЬ или обновите страницу
Если возникают проблемы со скачиванием, пожалуйста напишите в поддержку по адресу внизу
страницы.
Спасибо за использование сервиса savevideohd.ru
[LIVE WR] ESWC F-4 - 13.15
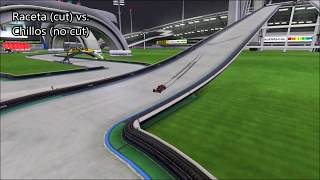
Former WR is 13.16 by Plastorex (+0.01) driven on 3rd June 2020 ( • Doing wr on F-4, while Walt is trying... ) TMX map link: https://nations.tm-exchange.com/track... I genuinely never thought there can be a more frustrating map than I-2... Oh boy was I wrong... It takes everything bad about I-2 (forced internal cam during the whole run, stupid bugs etc.) and it mekes it EVEN WORSE by making both cuts be extremely precise in order to get the WR, since these two cuts are basically the entire map xdd Because of that, this map can be divided into two parts: * the first cut * Have you ever dreamt about having to drive an incredibly precise cut while being completely blinded by a forced internal cam? You haven't? What a shame... since this is exactly what the first cut is all about. After the start, you have to line up for the roofhit. That means you will have to drift towards the right right as you enter the quarterpipes while simoultaneously releasing gas, and accelerating mid-drift, just to release gas again once you hit the roof, all this while steering towards the right xd There are two ways of approaching the roof, the plasto way (release less gas before the roofhit, and more after the roofhit), and the simo way, which I also used in my WR run (release more gas before the roofhit, and less after). I found the simo way to be a bit slower, but way more consistent, so I went for it. Once you hit the roof, you have to pray that you will land perfectly on the kerb, so that it will give you a slight speedboost, but not that big that you will smash into the opposite wall, and you also have to hope that you will land perfectly flat, otherwise you will (again) smash into the opposite wall or, at best, lose a shitton of speed and time. All this stuff has to be done while driving with a forced internal cam, which makes everything blind... * the second cut * While less complex and also less frustrating than the first, the second cut is what makes the difference between a great run and an ideal one. It all begins when you enter the wallride. You have to enter as low as possible, in order to preserve speed, but not too low, otherwise you risk prematurely falling off the wallride. If you got that right, you also have to time well the drop-off. The best drop-off is the one where you land as soon as possible into the finish (duh...). For the perfect drop-off, you have to leave the wallride a bit after it starts to turn to the right, so that it will make you fly straight into the finish below. Finally, while heading towards the finish line, make sure to steer right so that you stabilize the car mid-flight in order to touch the finish line with your front wheels, to save another hundreth. This run took me about 25-30 hours to achieve (way more than needed, I kinda got rusty at this game xdd). This run is good, it got an amazing first cut, and an underwhelming second one (I lost about .02 because of my innacuracy with the second cut). With this in mind, I think high-to-mid .0x should be possible, at least TAS-wise, if not RTA-wise. Timestamps: 0:00 - Live recording of the run 0:21 - Rendered run 0:38 - Comparison w/ Former WR 0:53 - Photo finish :P 0:57 - Compilation of all my runs under 13.20 Cya everybody next time! -Hellcat
Comments


![[LIVE FORMER WR] ESWC I-2 - 28.87](https://i.ytimg.com/vi/GfJy2eSov-k/mqdefault.jpg)

![[LIVE FORMER WR] TMN Race I-2 - 28.86](https://i.ytimg.com/vi/EdjYf8AewN8/mqdefault.jpg)
![[World Record] TrackMania Canyon E03 | 1:40'605 by Yogosun](https://i.ytimg.com/vi/1ESflhwDdZo/mqdefault.jpg)
![[LIVE FORMER WR] ESWC Bonus A-2 - 23.57](https://i.ytimg.com/vi/pGTHZ9B6USs/mqdefault.jpg)
