Скачать с ютуб How to remove your 2013-2015 Toyota Rav4 front bumper cover | ReveMoto в хорошем качестве
How to remove your 2013-2015 Toyota Rav4 front bumper cover | ReveMoto
2 года назад
Из-за периодической блокировки нашего сайта РКН сервисами, просим воспользоваться резервным адресом:
Загрузить через ClipSave.ruСкачать бесплатно How to remove your 2013-2015 Toyota Rav4 front bumper cover | ReveMoto в качестве 4к (2к / 1080p)
У нас вы можете посмотреть бесплатно How to remove your 2013-2015 Toyota Rav4 front bumper cover | ReveMoto или скачать в максимальном доступном качестве, которое было загружено на ютуб. Для скачивания выберите вариант из формы ниже:
Загрузить музыку / рингтон How to remove your 2013-2015 Toyota Rav4 front bumper cover | ReveMoto в формате MP3:
Если кнопки скачивания не
загрузились
НАЖМИТЕ ЗДЕСЬ или обновите страницу
Если возникают проблемы со скачиванием, пожалуйста напишите в поддержку по адресу внизу
страницы.
Спасибо за использование сервиса savevideohd.ru
How to remove your 2013-2015 Toyota Rav4 front bumper cover | ReveMoto
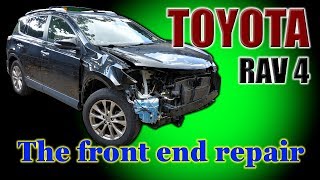
Learn how to remove your 2013-2015 Toyota Rav4 front bumper cover. We love Toyota because they keep it simple. Follow our detailed tutorial to get this job done quickly! Purchase here: https://bit.ly/13-15ToyotaRav4Bumper Website: https://www.revemoto.com 0:00 Start 0:08 Intro 0:22 Fender liner removal 3:14 Bottom bumper bolts removal 5:44 Top bumper/grille removal 9:28 Remove the bumper 10:19 Outro Thank you for stopping by to watch our 2014 Toyota Rav4 front bumper removal. This mini-SUV is very popular and extremely reliable. We expect nothing less from Toyota. Toyota also has a great practice to put all their products through rigorous testing while keeping very simple. This bumper is super easy to remove. Obviously, our customer was in a minor collision and need her bumper and passenger fender replaced. We'll do our best to show the detailed steps to remove this from the bumper cover. TOOLS NEEDED: You will need an 8mm socket wrench and a panel clip removal tool. If you do not have a panel clip removal tool, you can use a flat-head screwdriver as a substitute. That is what we used instead. PROCESS: God bless Toyota, this will be a very quick and simple bumper removal process for you. We dove in and went straight for the fender liners. There is a fender molding piece held on by a couple of push-pins. Remove those with your flat-head screwdriver or panel clip removal tool. Remove the 8mm bolt securing the fender to the bumper and you are one-third of the way done. We could not work on the opposite side because it was held on by zip-ties due to the accident but just repeat on the other side. We then moved to the bottom of the bumper and removed the lower bolts and clips. We always like to end our removals with the top part of the bumper. You never want to have the bumper fall on you or down pulling the wire harness. Remove the top of the bumper or grille. It is held on by a few bolts and screws. Because our bumper was broken on the other side, it just fell off. Normally, you would have to pull it off on each end. If your Rav4 has fog lights, make sure you unplug that as well. We hope this removal video helped you out with time and money. Follow Us on: FB: / revemoto IG: / revemoto Twitter: https://twitter.com/revemoto?lang=en _____________________________________ #toyota #rav4 #toyotarav4 #howto #revemoto #paintedautoparts #onlinepaintedparts #diyproject #diy #automotive #howto DISCLAIMER: While ReveMoto tries to make the information in this video as accurate as possible, we make no claims, promises, or guarantees about the accuracy, completeness, or applicability of the content. No information contained in this video shall create any expressed or implied warranty or guarantee of any particular result. All do-it-yourself (DIY) projects entail some risk. It is the sole responsibility of the viewer to assume this risk. ReveMoto is not responsible or liable for any loss, damage (including, but not limited to, actual, consequential, or punitive), liability, claim, or any other injury or cause related to or resulting from any information posted in this video.
Comments