Скачать с ютуб Wall Mounted Handrail Bracket Installation в хорошем качестве
Wall Mounted Handrail Bracket Installation
3 года назад
Скачать бесплатно Wall Mounted Handrail Bracket Installation в качестве 4к (2к / 1080p)
У нас вы можете посмотреть бесплатно Wall Mounted Handrail Bracket Installation или скачать в максимальном доступном качестве, которое было загружено на ютуб. Для скачивания выберите вариант из формы ниже:
Загрузить музыку / рингтон Wall Mounted Handrail Bracket Installation в формате MP3:
Если кнопки скачивания не
загрузились
НАЖМИТЕ ЗДЕСЬ или обновите страницу
Если возникают проблемы со скачиванием, пожалуйста напишите в поддержку по адресу внизу
страницы.
Спасибо за использование сервиса savevideohd.ru
Wall Mounted Handrail Bracket Installation
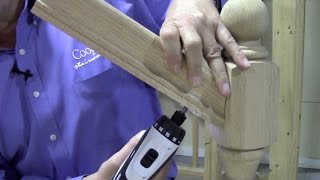
Check out this video for a full installation walk-through of our Wall Mounted Handrail Bracket! Are you interested in handrail? Check out this product page for information: https://www.stairsupplies.com/product... Are you looking for inspiration for your next project? Check out the completed project gallery here: https://www.stairsupplies.com/complet... (0:00) INTRO Our Classic and Long Reach Handrail Brackets are heavy duty, easy to install, and compliment nearly any handrail. Made from wrought iron, these handrail brackets come in 7 different finish options, ranging from Satin Nickel to Satin Black. Before you begin, make sure that you have all your handrails. In this video, we will only be showing you how to install the handrail brackets. We provide most of the materials needed for this installation. You will need to bring: A Power Drill A 3/16” Drill Bit A Tape Measure A Sharpie or Pencil Painter’s Tape Some String (0:39) STEP 1: Measure Your Handrail Height The first thing you will need to do is to determine the height of your handrail. Depending on the building code tolerances of your locality, measure straight up from the front of the nosing of both the first and the last step. In this video, we are measuring up a distance of 36”. Make a mark at each of these locations. (1:07) STEP 2 : Determine Your Bracket Placement Now that you have these 2 marks, take a piece of string and hold it diagonally between these two marks. It may be beneficial to grab a partner to hold one end of the string taut while you hold the other. Alternatively, you can use some pin nails and wrap the string around those to hold it in place. Make marks every 4’ or less divided between the 2 end points; handrail brackets should be no more than 4’ apart. Using a stud finder, ensure you are marking the handrail locations where studs are located. Fastening into wall studs makes sure the handrail is strong enough to pass code. (1:41) STEP 3: Mount Your Handrail Bracket Now that you have marked the locations of your brackets, you are ready to mount them to your wall. Take a 3/16” drill bit and pre-drill a hole into the stud behind the first mark. Use the supplied ¼” screw to attach the mounting bracket. Angle the bracket in the marked locations following the angle of the string. If you have an angle finder app, it may be beneficial to utilize it at this time. Repeat this step for all of your brackets along the run, making sure to run them at the same angle. (2:19) STEP 4: Mount Your Handrail Now that all of your brackets are securely mounted, it is time to mount your handrail. Rest the handrail on the brackets, centering the middle of the handrail on the brackets. Using a pencil, line up the holes on the bottom of the handrail. Using a 3/16” drill bit, pre-drill the holes on the bottom of the handrail. Then, take the supplied screws and tighten them into the bottom of the handrail. ENDING Thanks for watching this video on how to install your classic and long reach wall mount handrail brackets. To learn how to install more of our products, check out our YouTube channel at / stairsupplies or go to stairsupplies.com!
Comments